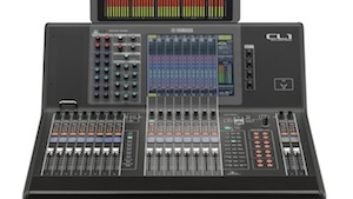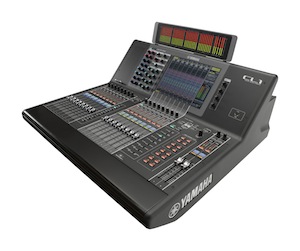
The CL Series marks Yamaha’s introduction of a new generation of digital mixing consoles, raising the bar a few notches above its predecessors, which include the M7CL, LS9 and the venerable PM5D. The CL Series consists of the CL1, CL3 and CL5, the three desks differing only in channel capacity, fader complement and metering. All models feature the same 8-fader Centralogic user interface, two-fader master section (one L/R and one Mono), eight analog Omni inputs and eight analog Omni outputs on rear-panel XLRs.
The CL1 we reviewed provides 48 mono and eight stereo channels under control of the Centralogic section and 8-fader “left” section (see specs for info on available configurations). Additional rear-panel connections include MIDI and word clock I/O, AES/EBU output, Ethernet ports for the onboard Dante network interface and three mini-YGDAI expansion slots. The console has an IEC connector for its onboard power supply, plus a port for connection to a redundant outboard supply. A meter bridge for the CL1 is optional and may be added at any time.
Expanding the analog I/O of any CL system requires either a mini-YGDAI card or a Rio (Rack I/O), a variety of which are available from Yamaha. Eight Rios may be controlled via the Dante network using standard CAT5E or CAT6 cable, either in daisychain or redundant configuration, but up to 24 units can be easily accessed from the CL interface, and maximum channel count is determined by the capabilities of the desk (a network switch is not required for daisychains). CL Series desks are capable of streaming 128 channels of digital I/O (64 in and 64 out) via the Dante network, at sample rates up to 48 kHz. Each CL console ships with a license for Audinate’s Dante Virtual Soundcard (DVS) software, enabling your computer to see the Dante network as an audio interface.
Versatile I/O
Yamaha supplied the CL1 with a Rio 1608-D (16 analog in/8 analog outs, all XLR), forming a 24×16 system. When configuring, it’s important to be aware of the difference between an input (a console channel) and a port (a physical connection). An Omni port may be directly “patched” to an input channel, whereas a Rio port must be patched via Dante bus to an input channel (ditto for the outputs). After a day of poking around the routing system, downloading DVS and Dante Controller software, getting the licenses installed, etc., I re-initialized the CL1’s memory. The CL1 booted and displayed the message “Device Type Conflict,” with the choice of Close or Jump To Dante Setup. I jumped. Dante Setup showed Rio 3224-D for devices 1 and 2 (the default). I changed the first to Rio1608-D and set the second to No Assign. The third device slot showed DVS (Dante Virtual Soundcard) indicating that the system recognized my MacBook on the network. Clicking Auto Setup in the Dante Input Patch automatically assigned the Rio1608-D inputs to Dante buses 1-16 and thus to channels 1-16, and my MacBook’s outs via the DVS to Dante buses 17-48 (and by default to channels 17-48). All good. Since I did not need the DVS outputs for the club gigs I’d be doing, I repatched Omni inputs 1-8 to channels 17-24.
Taking a cue from experience with the M7CL and LS9, I thought the last two Omni outputs might default to carrying the L/R bus, so I connected them to a pair of powered speakers—and there was sound. Kudos to Yamaha for (1) carrying over the OS, and (2) having designed a very user-friendly OS in the first place. I assigned Mixes 1 and 2 to 1608-D outputs 1-2, and patched these to a power amp feeding wedges for monitor mixes. Any output bus can feed any Omni port or Dante bus, and may be assigned to multiple ports simultaneously. If, for example, you need to route the L/R bus to the P.A. mains and a bar or restaurant system, you simply assign the L/R bus to an extra pair of outputs and run them to the bar (which is what I did after my first night of playing with those I/O routings).
Patching can be saved with a console file, provided the option With Dante Setup and I/O Device is clicked in the File Save/Load dialog.
The 1608-D serves as a stage box, so I put it in a small rack for transport and onstage protection. Initially I used Omni outs 7-8 for the L/R outputs, but on other gigs I routed the L/R outs to 1608-D outs 7-8, requiring no more than an Ethernet cable from the mix position to the stage. (No copper snake to carry!) To facilitate communication during soundchecks I patched a talkback mic into the CL1’s front panel (under the armrest). Any input may be used for Talkback, and Talkback may be routed to any output. No menus. Very convenient.

Yamaha Rio Series
Intuitive Operation
The CL1 is extremely easy to use—especially if you’ve mixed on Yamaha’s other digital desks. The Centralogic section calls up banks of 8 in or out channels, while the selected channel section provides access to almost all channel parameters without paging (you do have to toggle the 16 rotary mix encoders between send levels for Mixes 1-16 and Mixes 17-24/Matrix 1-8). Touching a section on the screen zooms on that parameter. For example, if you touch the on-screen EQ knobs a graph opens showing the EQ curve. The same is true of Gain, EQ, HPF, Dynamics 1 (gate), Dynamics 2 (compressor), Insert, DCA and Mute Assignment. Settings may be saved and recalled via library (see Try This).
You can leave the effects rack home when using the CL1. Four virtual effect racks each contain eight processor slots fed from any bus or inserted on any channel. Normally FX sends 1-8 feed the Standard effects rack while the Premium rack effects are used for patching via inserts. The Standard effects are basically a boatload of Yamaha SPX2000s, capable of generating delay, reverb, flange, chorus, pitch shift and many other effects. Also included are Yamaha’s VCM effects, which feature COMP276, COMP260 and EQ601 (you can guess what those are modeling). Outputs are routed to the eight stereo input channels. If you are willing to sacrifice a stereo-effect return, you can use a stereo channel for patching in a CD player via the rear-panel Omni inputs (which I did for walk-in music). All of these effects sound great, including the reverbs.
Premium effects include models of Pultec EQP1A, UREI 1176 and LA-2A comps, as well Rupert Neve’s Portico 5033 EQ and 5043 Compressor. Unfortunately I did not have hardware Porticos on hand for A/B comparison, but they did sound excellent, as did the EQP, which added a beautiful low-end whump to kick drum. A finite amount of DSP resources are available for the Premium effects, most of them requiring one “unit” of DSP. The exception is the U76, which requires two DSP units. When a U76 is loaded, the next rack position down becomes unavailable. This is really not much of a limitation because each Premium effect routes two channels and can be configured as either stereo or dual mono—allowing you to process 16 channels of audio. If you need more effects than are onboard the CL1, you have a problem.
The other two racks hold 16 graphic EQs, processing up to 32 audio channels. If you choose 31-band EQ you get 16 ‘graphs, but you can opt to trade any of them for two channels of Yamaha’s Flex15GEQ. The Flex15 enables 15 active bands across the standard 31 ISO frequencies. Bands that remain at 0 dB are considered unused, and as you adjust a slider, a window indicates the number of bands still available. It’s not a bad trade: if you have to hack away at more than 15 EQ bands, you probably have a more serious system problem beyond need of an EQ touch-up. As with the other effects, these EQs can be patched on any input or output bus, and settings may be saved and recalled via library.
I tested the CL1’s mix capabilities on a show that had been multitracked at 48 kHz to Digital Performer, played back through DVS. (One important note regarding DVS: it will not operate with Mac OS at 44.1 kHz. Hopefully, Audinate will address this issue.) The CL1 sounded fantastic and responded exactly as I expected. Configuring DCA and Mute groups was a no-brainer as was assigning effects, using EQ or dynamics and storing or recalling library settings. Yamaha’s File Translator software enabled me to import an M7 scene that I’ve tweaked over the past few years, carrying over almost all settings except the mapping of effect-send levels. The M7’s default effect sends are on aux Mixes 13, 14, 15 and 16, while the CL1 uses sends 17-24 for effects. The solution was a simple re-mapping of inputs to the effects rack so that Mixes 13, 14, 15 and 16 fed the first four processors.
Detailing all of the CL1’s capabilities would take pages, but here are a few highlights. Additional consoles may be attached to the network enabling, for example, monitor and FOH desks to share I/O. In that case the console with ID #1 controls preamp gain. Once gain has been roughed in, Gain Compensation can be engaged, whereby signal level on the network remains the same even if the preamp gain is changed over a range of ±24 dB. Channel insert and direct out points may be moved to several different positions in the signal flow, for example pre- or post-EQ, or pre- or post-fader. I was easily able to multitrack to my MacBook using DVS, assigning the channel direct outs to Dante buses, and setting the direct out points directly after the preamp—and there is an Apply to All Input option so that when you change the insert or direct-out point, you don’t have to do it 60 times (Nuendo Live is included in the package). Sends can be stereo-linked for stereo IEM mixes, and the Cue bus can be routed to any output. Every output bus has a 4-band EQ, phase reverse, signal delay and an insert point that accepts any rack processor.
Sound Performer
Using the CL1 was an absolute pleasure. It sounded great, was rock-solid and the routing capabilities are mind-boggling. As I have found with other Yamaha digital consoles, the user interface is easy and fast—both important when working under pressure. The preamps are clean with plenty of headroom, and the expandability and processing should be able to accommodate any application. As a bonus, acts that perform with tracks will no longer need a separate audio I/O setup for playback—they can simply attach a laptop to the network and treat the tracks as inputs. I’m not looking forward to sending back the CL1, but I am looking forward to seeing it on the road.
PRODUCT SUMMARY
Company: Yamaha
Product: CL1 Digital Mixing Console
Website:yamahaca.com
Pros: Excellent sound, incredible routing versatility, comprehensive onboard processing.
Cons: Dante audio network will not operate at 44.1 kHz with Mac OS.
Try This
The CL1 allows you to save and recall EQ and dynamics settings via onboard library. To save an EQ curve, first tap on the EQ in the Selected Channel Screen. The EQ Popup Window will appear (you may have to tap twice depending upon where you touch the screen). Click the On button and make your EQ adjustments. Then press the Library button and a list window will appear. Use Encoder number 1 in the Centralogic section to move through the list until a blank slot is highlighted and press Store. A naming dialogue will appear. Enter a name, click Store, then OK, and the EQ setting will be stored to the library. The same procedure can be used to store dynamics settings.
To check out the CL1 in-use, click here.