It takes a long time to grow a basement studio to the point where moving to a new facility is possible. For us at Studio B Digital Recording in Rockford, Ill., it took 15 years. Often, just leasing and renovating an old storefront or warehouse is the second stage of growth, but we decided that we wanted a place that was built exactly for our needs. We began looking into new construction techniques, and what we found was close to perfect for us. We discovered that for about the same cost as standard 2×6 conventional exterior wall methods, we could “pour” our new studio in concrete inside assembled foam forms.
A foam and concrete studio can be laid out in almost any fashion, including with curves, which is what we used for the corners of our building. The foam makes outer and inner runs held together by plastic tabs (made of recycled milk cartons). The space between these runs determines the width of your concrete wall. With the system we used, the walls could be varied from four inches to eight inches. In our case, based on SPL requirements, we determined that 6-inch-thick concrete would keep traffic noise out enough for our recording needs.
The foam forms are put together like plastic toy blocks. Each piece is light and easy to work with, but it does take some time. As the forms are assembled, rebar is placed inside for extra strength. When the wall is completed, a special “pumper truck” is brought in to pump the cement up and into the walls. This is the only scary part of the operation, because if a foam wall has a “blow out” you could have a real mess on your hands (and feet!).
The foam is left attached to the concrete after it hardens, acting as a thermal and vibration insulator between the outside world and the studio. The insulating value for both layers of foam together is about R20. The plastic tabs that originally held the foam in place are used for attaching siding to the outside of the building and drywall (or anything else) to the inside. (The inside of our facility was mostly done with drywall.)
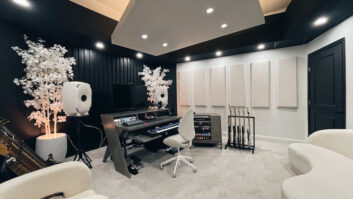
A concrete semi-floating floor sits on 1.5 feet of foam to help eliminate traffic vibrations. The cable runs were put in PVC pipes below the floor. We also used double windows (two in each opening-one outer, one inner) to allow natural light into the main tracking room while still keeping out road noise. A skylight in the control room just above the producer’s desk allows a natural, open feel to the room. We’ve had lots of compliments on the layout and uniqueness of the studio, and we recently won a local award for best studio of the year.
This concept of foam and concrete has been around for a few years, though it is just now starting to get popular. At least three manufacturers make variations on this theme, and they’re constantly upgrading their foam systems. As always, local codes have to be met, but we found that this type of construction exceeded all our local requirements. One word of caution: Make sure everything is well planned out! Once you’ve poured the concrete, it’s too late to say, “Oh, by the way, can we still put in an extra window?” Only if you’ve got a strong arm and a good chisel!