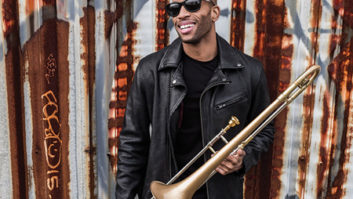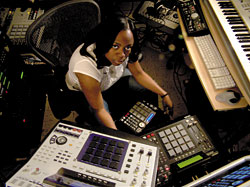
Producer/writer Stoni with all of her MPC units
A driving force in hip-hop production, Akai’s MPC music production center/drum machine has been used in all types of recordings, having crossed over to many musical genres and become a main instrument in live performances. In most studios, you’ll find MPC units ranging from the original MPC60 to the compact MPC500 and up through the latest MPC5000. Here are some of my tips and tricks from years of using the various types of MPCs.
COMPATIBLE PROGRAMS
If you use several MPC drum machines and want to exchange files, or you want to share files with other MPC users, here’s a quick, easy method. Before beginning this process, save your drum kits and sounds in a program (PGM). Now, let’s say you’re working on the MPC4000 and want to bring your programs, sounds and samples into the MPC500. Connect both units to the computer via USB cables. The MPC4000 comes pre-installed with a program called ak.Sys, which provides access to its hard drive while it’s mounted on the computer. Once the MPC500 is connected to the computer through the USB cable, it mounts to the computer desktop as a separate hard drive. The MPC500 reads files through its Compact Flash card memory slot. With both units mounted on the computer’s desktop, you should now be able to drag-and-drop files from the MPC4000’s ak.Sys system to the MPC500 that’s mounted on the computer. You can also use this configuration for the MPC1000 and the MPC2500, which also have optional hard drives that can be mounted for gaining access.
ZIPPING WAV SOUNDS
You can import sounds into the MPC2000 using a 100MB or 250MB Zip disk. The newer MPC1000 and MPC2500 models can store files on a Compact Flash card or internal hard drive, or read directly from a DVD drive. To drag-and-drop WAV files from my computer to an MPC2000, I usually connect a USB Zip drive to my computer and hook up a second Zip drive to the drum machine’s SCSI port. With the USB Zip drive connected to my computer and the Zip disk inserted, I can search my sound libraries for WAV files. Afterward, I take the same mounted Zip disk from the computer, insert it into the MPC2000 and load my WAV sounds. Working from the MPC2500, I can load sounds directly from a DVD without mounting anything to my computer. This unit is the only model that has a CD/DVD-ROM drive.
BEGIN THE SEQUENCE
The MPC is a pattern-based sequencer. On power-up, the default setting for a basic pattern is usually 16th notes that are quantized within the 4/4 time signature. If you’re trying to take your track and beat to the next level when sequencing with the MPC, then adjust the time signature, which changes the flow of how I begin a pattern. By doing this, you’ll notice a difference in the way that the beat, rhythms and patterns swing.
THE LINEAR RECORDING APPROACH
Most MPC users are familiar with creating one pattern at a time and then making pattern-based songs, but here’s a way to make the MPC have a more linear recording feel when putting your music together. Start this process by going into Song mode to insert all of your created patterns into one song. While in Song mode, use the Convert feature to transform this song into a pattern. Once the song has become a pattern, you can add instruments and tracks, and play straight through this same pattern — which is really your song, but in a style that gives you a feel for linear recording.
OUT ON THE ROAD
For live performance, I prefer my MPC2500, which can create a patch phrase of my track. I start by making a beat using the MPC2500 and then sample the beat back into the same drum machine to create a patch phrase of my track. So rather than create pre-recorded sequences to perform with, I can shoot all of my original compositions directly from the MPC2500 by simply tapping on the pads.
To do this, first create your sequences. Now press Mode/Record, and with the input indicator set to Main Out, press Play. Once you’ve completed this, you won’t see any audio levels, but when you press the F6 pad from within the Record page and then press Play/Start, you’ll begin recording all of the audio from your pattern. Press Stop, name the sample, assign it to a pad, hit Mode/Trim, scroll to find the “named sample” you just created and edit the sample to your liking. After editing, select Chop (the F5 pad) from the screen and hit Do It. Now the sample should be chopped into different regions. From that same page, Convert (F4 pad) your “named sample” into a patch phrase. Here, you can also change the patch phrase’s tempo by pressing Do It (F5 pad) from the screen. Your patch phrase is completed. Go back to your main screen and assign that “named sample” to a pad so that you can easily trigger your sample in a live performance.
Stoni is a hip-hop producer and music technologist based in New York City. Visit her at
www.stonisndz.com.