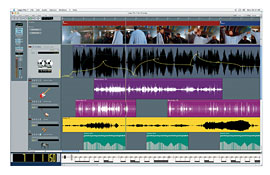
Logic 7 offers breakpoint editing of all automated parameters.
With legions of dedicated professional and pro-sumer users, Apple’s Logic Pro 7 is arguably one of the most popular DAWs on the market. Many users have followed the program from its humble beginnings as a sequencer to its current incarnation as an audio/MIDI powerhouse, while recent converts have been brought into the fold based solely on the strength of the bundled soft synths and effects. With Version 7, Logic sheds its dated Emagic-era GUI and took on more of the look and feel of the larger Apple Pro Applications line. Here is a collection of tips and tricks that are intended to benefit the seasoned pro and those users who may be migrating over from another DAW.
D.I.Y. DRUM REPLACEMENT
Even though Logic doesn’t ship with its own sample-replacement plug-in, that doesn’t mean you have to spend extra just to replace a less-than-ideal drum sound. To replace a drum sound with Logic, drop a gate onto the offending drum track. Dial the gate in until there is absolutely no bleed from the other mics. It won’t sound like much at this point, but all you’re looking to do is isolate the transients of the drum that you intend to replace. From here, engage the Audio-to-Score function, which will create a MIDI file based on the drum track. From here, simply call up your drum machine of choice on the newly created MIDI track and blend to taste.
AUTOMATING BUSES, MASTER FADER
Adding automation to the buses, outputs and associated plug-ins is a very easy procedure. Create a new track in the Arrange window and assign it to either a bus or the master fader. You’ll then be able to automate the faders themselves, as well as any plug-ins in exactly the same manner as audio and instrument tracks. Not fast enough? An even quicker way to automate a bus or master fader is simply to turn the Automation mode to Touch on your desired track and make some quick moves, and the program will automatically add a new track to the new Arrange window.
FORCING PLUG-IN VALIDATION
The Logic Audio Units Manager is designed to prevent system crashes and nudge users into keeping their third-party products current. When a plug-in fails the initial validation process, for whatever reason, all is not lost. To get around this, open up the Audio Units Manager (Logic Pro > Preferences > Start Logic AU Manger), find the plug-in and simply force the system to recognize it.
Most of the time, a plug-in fails for very minor reasons, and you can easily keep a session moving by forcing the program to use it. However, in the instance that you authorize a plug-in that’s causing more harm than good, you can easily reverse the process by returning to the Audio Units Manager and reversing the process.
ALL LINED UP
With the last major Mac OS release (10.4), Logic users were finally able to enjoy full plug-in delay compensation, but it wasn’t a perfect fix. If you intend to run latency-inducing plug-ins on buses, sends and outputs, it’s best to wait until a project’s mixing stage, because with the current implementation, if you attempt to record or overdub a track — especially audio instruments — with latency-compensation engaged for all tracks, then the track you’re trying to record will be out of time with the rest of the session.
If you have to track additional material once you’ve started adding a latency-inducing plug-in to the buses, the best workaround is to simply bypass each latency-inducing plug-in. If you’re using any of these plug-ins on an output, the most workable option is it to save those channel strips as presets, clear the inserts, resume recording and recall the settings when you’re finished.
QUICK, DIRTY QUANTIZE
A seldom-noticed audio effect that came with the 7.1 update is the Enhance Timing effect. Though not the most elegant or robust time-correction method on the planet, Enhance Timing is a great way to remove minor flams and other less-than-egregious timing errors quickly.
The only real trick to using the effect is knowing where and how to use it. Enhance timing can only be inserted as the first audio effect on a track, and it’s not available if you try to audition it in a different slot. You can dial in a desired grid resolution and percentage (i.e., how much it will force the audio to adhere to selected resolution). If you like to record dry guitar and use an amp modeler, then Enhance Timing can be an effective way to tidy up your guitar or bass performances without having to perform a hard edit.
REXING HAVOC
Having trouble getting REX files to work in Logic Pro 7.2? The most likely culprit is that you don’t have a current version of the REX Shared Library installed on your machine. Luckily, this little item is available as a free download from Propellerhead’s Website (www.propellerheads.se), and the whole procedure takes about five minutes.
Robert Hanson is a former Mix and Remix editor.