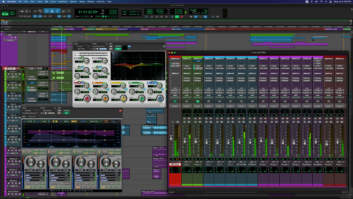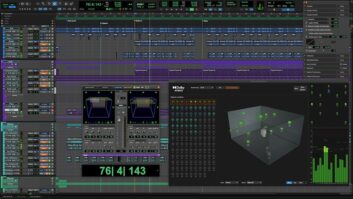
The star feature of Pro Tools Version 7.4 is Elastic Time (ET). Similar to MIDI, ET can conform audio data to changes in tempo or time. This is useful for fitting drum loops to a song’s tempo or changing the tempo of your entire session, as well as adjusting vocal phrasing. Compared to Beat Detective, ET allows for larger tempo changes and does a better job of preserving the inside feel of hi-hats and snare ruffs without sounding choppy. ET also simplifies workflow using Groove Templates for quantizing — once you quantize your kit, you can still experiment.
GOING INTO WARP
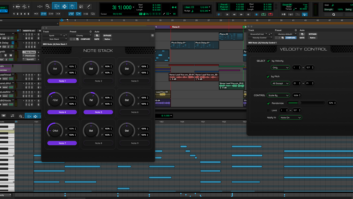
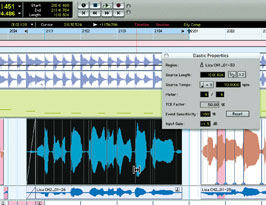
The Elastic Properties window provides access to TCE parameters.
When using ET, Pro Tools examines the audio and automatically places Analysis markers at the top of transient events. Generally, you should let Pro Tools automatically create Analysis markers. Timing changes within a region are accomplished with Warp markers, which are created automatically over Analysis markers when you quantize, or you can manually add them as needed. If you think of an ET region as a rubber band, then the Warp markers are the pins that anchor different parts of the region in time.
Creating Warp markers automatically often works well, but some spots may need manual adjustment; for example, if you want to quantize a certain hit that isn’t the group’s earliest marker (like a hi-hat beat that falls slightly in front of a kick drum when the kick should be on the grid) or when an automatic Analysis marker is slightly off.
To adjust markers manually, put the drum kit channels into Warp View mode and zoom in to see precisely how far the warped transients are from the grid. Use the Tab key to advance through the Warp markers and fix the ones that are in the wrong place. Then put Pro Tools into Grid mode (the Grid should match your quantize level) and select the Grabber tool. Tab to the next Warp marker — if it looks good, tab again; if not, you can move the Warp marker by hovering over it while holding the Control key. The cursor will then look like a little Warp marker with arrows on either side. Drag the Warp marker to the proper place and release. Then, if you hover over the Warp marker without holding Control, you will get a cursor that looks like arrows only. Drag the Warp marker onto the grid, press the Tab key and repeat.
IN THE MODE
ET has four different real-time Time Compression and Expansion (TCE) algorithms, each suited for different applications. Use the Polyphonic mode for general instrument tracks; the Rhythmic mode for drums, loops and percussion; the Monophonic mode with mono voices and solo instruments; and Varispeed for analog tape deck VSO-style effects.
The Rhythmic Algorithm works by not stretching the transient just after an Analysis marker, and then crossfades into stretched audio until the next marker. This way, the transient is not smeared by the TCE. It also means that under certain circumstances, you can hear the transition to stretched audio. This effect is easy to hear on an open cymbal crash that occurs just before a breakdown section or at the end of a song. In such cases, separate the crash as its own region (across the group), and with the region selected open the Elastic Properties window (Option-5) and set source tempo to the current song tempo. (The TCE factor will change to 100 percent, which is not stretched.)
Both the Polyphonic and Rhythmic Algorithms have real-time adjustments for fine-tuning. With Elastic tracks, click the tab next to the ET plug-in selector to open a little plug-in that allows window-sized adjustment for Polyphonic mode and decay-time adjustment for Rhythmic mode. This Rhythmic decay adjustment can be important for spacious loops, but for acoustic drums the default setting works well.
FLIM FLAMS
Say the drummer you recorded plays his hi-hat part early relative to his side-stick beats across the snare rim. Here’s a trick for removing an unwanted flam that precedes a hit that you have corrected. You can clean up most of these errant hits by first making sure the side-stick is warped onto the grid, then go into Slip mode, select from the top of the early hi-hat beat and hit Shift+Tab, highlighting to the top of the stick. Change to Waveform view and delete the selection. Switch back to Grid and Warp view, then use the Grabber tool to grab the right edge of the previous region before the separation and pull the edge over to where it snaps to the stick hit.
CPU SAVER
Elastic Time uses your computer’s CPU to do its processing in real time. Rendering the audio can lighten the load. By choosing Rendered-Processing from the ET plug-in selector, the Elastic regions are written to a temporary folder and the green LED goes out on the Elastic plug-in tab. All of your Warp and Analysis markers stay intact and you can return to real-time mode simply by selecting Real-Time Processing.
Steve MacMillan is a mixer/engineer and has owned Pro Tools since V. 1. He has worked with Shania Twain, Seal, Rod Stewart, Toto and Kelly Clarkson. Visit him at
www.macmandigital.com.