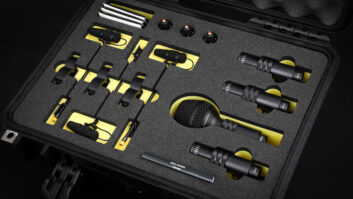
I wouldn’t dream of recording drums in my studio without my SPL Transient Designer 4 (TD4). Boosting its attack controls on drum tracks can give kick, snare and toms the extra punch often needed to make them come alive. When you’re processing tom tracks, lowering the TD4’s sustain controls is a much more transparent (and speedier) remedy for reining in timpani-like sustain than smothering batter heads with duct tape. And for reducing excessive cymbal bleed into tom mics, just turn the TD4’s sustain controls counterclockwise for inputted toms and you’re done.
However, Transient Designer sounds great on more than just drums. Crank that sustain knob on soaring guitar solos to make David Gilmour blush. Or boost the attack on dampened ostinato parts played low on a six-stringer to make that rock ‘n’ roll vamp jump. These are just a few of the well-known — but powerful — applications that the TD4 and its 2-channel sibling, Transient Designer 2, excel at. But there are more tricks up these designer sleeves than what the casual engineer might at first think to fashion.
TALKIN’ TRASH
Tight, discrete-sounding drum tracks are cool, but trash is a bash. When your drums’ room mics sound like they were placed in a shoe closet and you’d prefer the sound of an empty warehouse, Transient Designer can provide instantaneous moving services. Route the stereo room mics through two of the TD4’s linked channels (channels 1 and 2, or 3 and 4) and crank the unit’s attack controls to put a point on the traps. Then, slowly raise the sustain controls on both channels to bring up the room tone for an “all-buttons-in,” 1176-type sound — without pumping cymbals. Fine-tune the sustain control settings so that the room mics’ envelope more or less ends on the desired upbeat or downbeat for a driving rhythmic effect.
Did your bass player drink one too many beers before your recording session and play a bit too legato on that samba tune? Even so, you may not need to re-cut the track to make it swing. Here, Transient Designer works better than coffee. Route the bass track through one of TD4’s channels and lower the sustain control until the player sounds like he or she is leaving clear breaks on the downbeats. Legato becomes staccato, propelling the rhythm section forward.
AND NOW, FOR NEW REVERB
Are you bored with using the same tired reverb patches on your productions? Patch your reverb’s left- and right-channel outputs through linked Transient Designer channels to add a little pizzazz. (For all of the applications in this article that involve processing reverb, return the Transient Designer’s two outputs to your DAW or mixer and pan their signals left and right, respectively, to match the pan settings you originally used for the reverb’s outputs.) Boost both attack controls on TD4 to the max and lower the sustain controls to their minimum settings. You’ll notice that the reverb’s intensity at its onset will subtly increase while the apparent decay time decreases.
Take the exact opposite approach to process a reverb patch so that it exhibits a pyramidal slope. Turn Transient Designer’s attack controls on two linked channels fully counterclockwise and crank the sustain controls to the max. With these settings, the onset of the reverb patched through Transient Designer will be de-emphasized, but the effect will bloom and then tail off over time (as long as the reverb program’s decay time is set to a sufficient length so that it continues evolving during the unit’s sustain phase).
Transient Designer can also create reverb effects that “move” from one channel to another. For this application, the best reverbs have a long decay and long pre-delay or prominent reflections programmed to occur after the onset of the diffuse reverb tail. Once again, patch the left- and right-channel outputs of your reverb processor through two channels of Transient Designer, respectively — only this time, leave the Link button switched out for the channel pair. On Transient Designer’s “left” channel (e.g., channel 1), set the attack control fully clockwise and back off the sustain control slightly (to roughly -1.5 dB). On TD4’s “right” channel (channel 2), set the attack control fully counterclockwise and the sustain control to roughly the three o’clock position (or +12 dB). With these settings, the reverb will retain the original complexity of its reflections, but the effect’s maximum intensity will move from your mix’s left channel to the right channel (while the overall reverb effect still persists in both channels).
You can make the movement more dramatic by setting Transient Designer’s channel 1 attack and channel 2 sustain to their maximum settings and channel 1 sustain and channel 2 attack to their minimum settings, but the resulting stereo image of the effect may sound too lopsided.
ONE LAST DRUM TRICK UP MY SLEEVE
TD4 can also be used to superimpose the dynamics of one track onto those of unrelated tracks. For example, patch two mults of a kick drum track into channels 1 and 3 of TD4 and send the outputs of those two channels “out to get pizza” (i.e., somewhere they won’t be heard). Patch a stereo keyboard track into TD4’s channels 2 and 4 and activate both of the unit’s Link switches. Next, boost channels 1 and 3 attack controls to emphasize the kick drum’s slammin’ nature. TD4 will dynamically adjust the attack of its processed keyboard tracks to track the dynamics of the kick drum. Try it — you’ll get the point!
Mix contributing editor Michael Cooper is the owner of Michael Cooper Recording, located in beautiful Sisters, Ore.