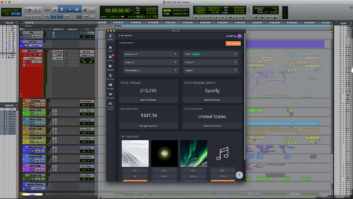
A few of MOTU Digital Performer 4’s audio and MIDI treats
Digital Performer 4 from MOTU is one of the most robust DAWs available, featuring formidable audio capabilities coupled with a devastatingly powerful MIDI sequencer. The application is quite comprehensive — with a manual that weighs in at more than 900 pages! — but DP4 can do a lot more than what immediately meets the eye. I’m going to drill down a bit and point out some tricks to help you pull even more power out of Digital Performer 4.
SAVE YOUR CLIPPINGS
Digital Performer 4’s Clippings feature is often overlooked, but it can save you time and make your work far more efficient. You can select and make pretty much anything a clipping that will be available to be dragged into play at any time.
There are Digital Performer or Project clippings available; the former type always appears in the Clippings window, regardless of which project you’re working on. The latter variety is only available in the current project. To set up a Clippings window, choose Project>Clippings> and then either New Digital Performer Clipping Window or New Project Clipping Window. Then select whatever you’d like to make a clipping and choose Edit>Copy to Clipping Window. The alternative is to drag things into the Clipping window.
For example, you can set up instruments or effects on the channel’s inserts and save the entire stack as a clipping. Then, drag that clipping to any channel on the mixer and the entire stack will appear. You might have frequently used combinations, and it’s nice to have them in a “rack” that can be dragged in. One example would be an EQ/compression/limiting combination for use on the master. To do this, once you’ve established your stack of plug-ins, shift-click on the left edge of each so that all are selected and highlighted yellow. As you move your cursor over the left edge of any of them, a hand-grabber cursor appears, which you can use to drag the whole thing into your Clippings window — a simple but very effective time-saver.
LET’S GO CHOPPING
A clever way to come up with nice rhythm synth parts is by chopping a pad rhythmically with a keyed gate. Lay down a pad with the chords of the song played in blocked fashion end to end. (Digital Performer 4’s Region>Change Duration command has an Extend Releases to Next Attack option to yield really tight and smooth transitions from one chord to the next.) Put a gate on that synth’s audio output with a sidechain set up to receive the input of a bus, say bus 1. Set up a trigger track, most likely a very transient percussion instrument — hi-hats work particularly well. I recommend using a soft sampler.
Send the output of the trigger track to bus 1. Start playback and tap out the rhythm you’d like to hear. You’ll need to adjust the threshold, attack and decay of the gate to yield the envelope you’re looking for. With that accomplished, you can record the resulting chopped synth while playing the rhythm that you want, or you can record the MIDI that controls the trigger and then quantize to get it perfect or create a groove. This same technique can be used to chop up anything, so don’t be afraid to experiment.
DRUM REPLACEMENT THERAPY
Digital Performer 4 has a very slick way to fix awful-sounding drums that can’t be fixed with any amount of EQ or dynamics massaging. The Trigger plug-in listens to your audio and triggers a MIDI note of your choice whenever it hears a drum hit. Simply plug Trigger into the snare track, for example, and set up a soft sampler, hardware sampler or drum module — your choice. Trigger allows you to determine which MIDI note is sent, and thus, the drum sound you’ll get. There are also controls for the threshold at which the trigger happens, the duration of the MIDI note and a slider that allows you to compromise between less latency and better velocity tracking. A Retrigger delay also determines the minimum amount of time between triggers. You’re not going to get 64th-note triplets precisely right, but for most purposes, this thing is manna from heaven! You’ll probably want to record the new drum and then nudge the track earlier in time to compensate for the latency introduced by the triggering process.
POLAR EXPEDITION
POLAR allows you to record one pass after another until you get the perfect take and build rhythm loops very easily. It records into RAM, solving speed issues to enhance the interactive nature of the process. One trick is to overdub new loops of differing lengths over the initial one. You could, for instance, start with a four-bar loop and then set up an overdub to be three-and-a-half bars long. The result is that every time the initial loop plays, the second shorter loop starts at a different place in relation to the original one. You can do this as many times as you want, with loops of different lengths every time. You can even put longer loops over the top of shorter ones. This is not unlike a digital Echoplex, only quite a bit more sophisticated. Robert Fripp fans, take note!
John McJunkin is the principal of Avalon Audio Services (Phoenix).