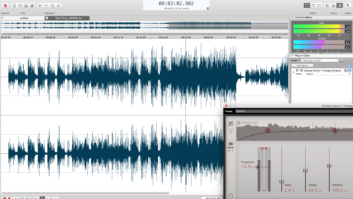
Beyond cleaning up old vinyl recordings and forensic audio chores, Sonic Foundry’s Sound Forge 2-track editing system (with its DirectX Noise Reduction plug-in) can be used for mastering as well as for day-to-day enhancement of audio files. Here are some techniques I used on the CD re-releases of vinyl recordings, such as Martin Luther King’s “I Have a Dream” speech and Freddie Fender’s Live at Gilley’s (where it looked as if someone took a knife to the grooves). I used Sound Forge Version 4.5g and Noise Reduction Version 1.0b, which have since been upgraded to Versions 5.0 and 2.0a, respectively, but these tips will work on any version of the programs.
TURN THE CLICK AROUND
The Noise Reduction plug-in can remove clicks and pops from old recordings as well as in brand-new ones, such as occasional clicks/pops in digital files. Usually, the Click and Pop (V.1.0b) or Click and Crackle (V.2.0a) removal plug-in handles the problem nicely. But, every once in a while, a click is so stubborn that the preset won’t do it successfully. You can adjust the parameters of the software to try and remove that pesky pop or try the Vinyl Restoration algorithm. However, this may cause audible side effects if you use extreme settings.
A Pencil tool is available in Sound Forge, but I shy away from redrawing audio waveforms. Here’s another way to handle the click problem: First, define the close region around a click or pop and double-click to highlight it. Go to Sound Forge’s Process menu, and use the Reverse function on that region. Apply the Click and Pop/Crackle Removal algorithm. In Version 1.0b, use the Interpolate rather than Replace function. Then, re-reverse the highlighted region. In 99% of the cases, the click is gone, without audible side effects.
PRINT ME SOME HISS, PLEASE!
The Noise Reduction feature does a good job of getting rid of hiss, but capture a “noise print” of the hiss in a mix before the track starts for an accurate, song-specific sample of the noise you want to remove. When mixing, print some hiss before the song’s count off, with all of the effects units on, faders up, etc. — sans any automation, mutes and gates.
Capture that noise print where the hiss is steady-state, as described in the manual. Apply a few dB of the Noise Reduction twice, rather than a lot in one shot. The noise reduction will be virtually transparent if used in this manner, with no audible side effects.
Check the Keep Residual Output box during your real-time preview to hear what the program is removing. If it sounds like swirly, dithery zipper noise, then it’s probably okay. If you hear any of the program material, then you’re overdoing the NR, so back it off. Find what works without side effects and remove that amount of noise. Then try re-applying it a second time, at the same or less amount. On difficult passages, you might try a little bit a third time, if you’re daring. When you get it right, you will truly believe that digital audio can perform miracles.
You might want to keep these noise prints on file (in the presets location), so if you get a tape without any hiss before the song starts, you’ll have a library of prints to try out, and see if these work better than a default.
NEED SOME AIR?
The Noise Reduction program has a nice high-shelving EQ that defaults to +3 dB at 7k Hz. Designed to compensate for overusing the Noise Reduction, it’s designed to sound like an air band-type EQ. The corner frequency is adjustable from 500 to 15k Hz, with a ±20dB gain range. Sometimes, a 1 to 2dB boost works nicely, even without any noise reduction, giving you a bonus signal processor you didn’t even think you had.
MP3 ME!
If you’re working on material to be used online — data compressed, downloaded or streamed — you can encode the sound file and find out what gets ruined when you convert it. If a tune needs some bottom, a little compression and a bit of top to fix it, then try doing that same processing to the file before you convert it. After some experimentation when it’s converted this time, it should sound the same as the “fixed” file you tried to restore the first time. Also, try taking a noise print of some hiss from a bit of pre-roll on the converted file and add that to the preconversion processing to remove some of the hiss you’re sure to get after it’s converted.
Bob Buontempo is a freelance engineer, producer and writer based in the New York City area.


