WaveLab has been with us for quite some time and has evolved into quite a powerful and popular digital editing and mastering software package. Having used it since its introduction, and having taken it through hundreds of mastering, re-mastering, restoration projects, editing sessions, tossed CD-Rs and consultations with the programmers, I’ve come up with some tips and techniques for mastering and editing in WaveLab.
MASTERING
To get the best results, follow these simple rules: In Preferences (Ctrl P), under the File tab, set your temporary files to 24-bit. Processing is slightly slower and uses more disk space, but it will result in better sound quality when you apply additional processing to the audio material. Set your temporary files folder to a location on a different hard drive than the one where you store your main files; by using two different drives, you can double the processing speed.
PREPARING AUDIO FOR EDITING
First, eliminate DC offset. Apply this function first to the entire file before any processing. A DC offset is problematic for two reasons: It affects where the zero crossings appear and, hence, the smoothness of your edits; and your plug-ins will not work optimally when performed on files with a DC offset. Next, normalize. Set to 0 or -1 dB, but keep it consistent for all the files that you are mastering. Then trim ends to zero crossing points. WaveLab can automatically search for zero crossings so that the selection begins and ends at a zero crossing. To set this default, activate Snap to Zero Crossing: Select Preferences from the Options menu, click on the Editing tab and fill out the Snap to Zero crossing options.
THE MASTER SECTION
Place the Loudness Maximizer or any other mastering limiter maximizing plug-in last in the chain; this keeps everything from going past 0 db while setting up. Now, what comes before is primarily up to you, but I recommend this: You want your Maximizer to work as efficiently as possible. So, obviously, your EQs and multiband compressors must come before it. Eliminate unwanted sub-sonic frequencies in particular, and you will notice that you will get more amplitude and a cleaner sound. If you use a curve-analyzing software, like Freefilter, then place it first and multibands next. Also, I don’t recommend morphing your curves much more than 50%.
MONITORING GAIN
Gain structure is vital for a clean, lots-of-headroom sound. An important and overlooked tool is the Mon button in the Master Section window. It is crucial in digital mastering that you avoid clipping. When Mon is activated for an effect slot, the outputs of that effect are assigned to the Clip indicators and meters. Note: To reset the Master Section’s faders to 0 dB, simply hold down Shift and click on the faders. You can use the same technique to reset certain parameters in some plug-ins.
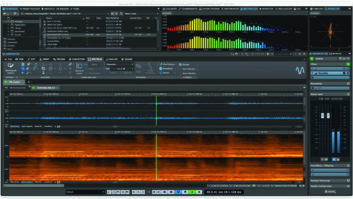
REAL-TIME SIGNAL ANALYSIS
Create a new montage and open the file you want to analyze. Hit Ctrl-A to select the whole file, then click and drag the file into the Montage window. Click Meters on the Montage window, then Spectrum instead of Level. Any changes to the audio signal in the Master Section will reflect, in real time, in this monitor spectrum.
BATCH-PROCESSING
Use this after you have mastered all of your files, and make sure you send your meta-normalized files to a new folder. Never overwrite; the purpose of the plug-in is to apply the same and maximum possible level/loudness in all files without ever clipping. This is extremely useful for matching levels between tracks. Depending on how much the levels differ between files and the desired result, there are a number of options available to ensure that the applied processing optimizes the levels without clipping. I have always had great results by using these settings: Maximize if possible, activate this option, and if the loudest file can still be amplified, this file will be maximized as much as possible (without clipping) and then used as reference for the rest. Equalize loudness (RMS): RMS produces a more “natural” result than peak levels; this method is better at detecting the “loudness” of a sound. Global: The overall loudness of the entire file will be used as a basis for calculating the loudness. This helps keep dynamics alive.
NORMALIZER AS LIMITE
If you are batch-processing, various processors in the signal chain may increase the signal level. If the signal is converted to an audio file with lower resolution (such as 16 bits), then clipping may occur. To avoid this, insert the Normalizer at the end of the signal chain in the Batch Processor and activate “Only if Clipping.” The Normalizer will lower the signal level so that it peaks exactly at the specified value, but only if clipping should otherwise occur. This allows you to use the Normalizer as a completely distortion-free limiter.
Atom Troy is director of computer audio production at The Center for Electronic Communication at Florida Atlantic University, and is an artist/producer on Nebulous/Atlantic Records.