
Elton John’s “Philadelphia freedom.” Diana Ross & the Supremes’ “Someday We’ll Be Together.” Train’s “Drops Of Jupiter.” Prince’s “Purple Rain.” What’s the common thread? All of these songs have a memorable string track. While strings are not considered to be the foundation of today’s music as they once were in their glory days, a well-mixed string section can still lift a song to new heights — whether the style is pop, rock, country, bluegrass or jazz.
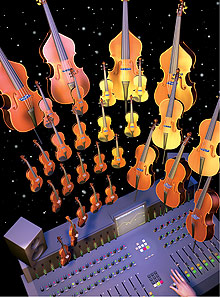
Illustration: Chuck Dahmer
This article is not about orchestral mixing; rather, we’re going to concentrate on incorporating a string section, quartet or soloist in a popular music setting: with drums, bass, guitars, vocals and even other ensembles. We’re going to talk about overcoming unique string-mixing challenges such as building “sections” with a single player or dealing with audible click tracks. Tackling these little issues sets a great string track apart from a merely good one. For polishing these tracks, we’ll outline techniques for using creative reverb tweaks to give your strings their own ambient identity, as well as panning techniques to draw the listener in by balancing the strings as a section and within the overall mix.
PANNING FOR FOCUS
After the faders come up, your first decision involves panning. Placing the strings in the overall mix will affect other decisions, such as how much and what type of reverb, or if you need to boost or cut EQ to make the strings heard above the other players. Traditional orchestral panning (violins left, violas center and cellos and basses right) should be your starting point, but when strings are integrated into a pop ensemble this approach can sometimes cause instruments in the string section to compete with the other instruments in the mix.
Fig 1: Pan parts to their opposite sides for a smoother balance across the stereo image.
Placing the basses to the right, for example, drags the low end to the side, taking the focus off of the kick and bass guitar. The E string on a double bass is 41.2 Hz, which is squarely in kick drum fundamental and bass guitar territory. Panning all of the violins to the left takes the listener’s attention off of the main ingredients, such as a center-panned vocalist or solo instrument because they also often reside in the same range. Instead, pan your string bass parts to the middle to center the mix’s lower end. Also, if your parts are all on separate tracks, start with them panned in the traditional way but pan some of the parts to their opposite side for a smoother balance of parts across the stereo image. (See Figure 1 on page 24.) This method of panning the strings across the center will make the individual parts more prominent because they’re not fighting for shared frequency space in such a tightly panned group, but are spread across a wider soundstage.
If you’re mixing a band that has varying soloists, such as a bluegrass or jazz group, then start by panning the instruments as you’d see them onstage. This method of panning works especially well if the players are trading solos or even trading fours, because the listener hears the solos coming from different points across the soundstage, just like they’d hear the band if they were playing live.
Traditional panning works well with a string quartet: violins left and left-center, viola right-center and cello right. This arrangement is effective because the cello doesn’t present as strong of a low-end presence as bass, and it won’t draw as much attention away from the center of the mix. This grouping also gives the quartet a “human” footprint in the track, a familiar aural element within the overall “band.” Panning the quartet wider or narrower can give you even more latitude when trying to distinguish strings from competing instruments in the stereo space. For instance, if the strings are masking stereo background vocals, then pan the vocals in tighter and the strings wider. Or if the strings are sounding as wide as a house, pan them in tighter to give the group a more intimate feel.
EQ AND COMPRESSION
Once you’ve determined your panning scheme, you can decide if you need EQ to smooth out any strident spots in the tone or give individual parts a clearer identity in the mix.
Strings have inconsistent timbre across their range and some notes can be harsh and brittle sounding. This is attributable to instrument construction, bowing style and even the room, which can accentuate unflattering tones. “Screechy” quality is especially noticeable with a solo part; a section tends to mask individual timbre problems.
Harshness can also be minimized with selective mic placement while recording (see “Before You Mix,” below) and during the mix by automating an EQ plug-in to smooth out problematic notes. You don’t want to throw out the baby with the bathwater by cutting a band of EQ for the entire length track just to fix a momentary problem. First, find the offending band by looping a harsh section and boosting the EQ at a middle Q setting of 5 to 10. Once you narrow in on the target, write the EQ gain flat for the entire song, pulling the band’s gain down only when the brittle notes appear.
After you’ve EQ’d away any tonal inconsistencies, check for notes that dynamically jump out of the mix. Here, try some mild compression to help keep the volume smooth over the entire track. For this application, if you are using a hardware box, choose a compressor that controls gain without putting too much of its own personality into the mix — heavy-handed compression can suck the dynamic life out of your mix. In this case, you want to lean less toward something that will change the tone like a Distressor and more toward something like the GML 8900 dynamic range controller or Manley Variable MU.
No matter which compressor you use, setting choice is critical in maintaining transparency. Set the ratio to a mild 2:1 or 3:1, find spots in the track where the part jumps out and set the threshold so that the compressor catches just the top volume offenders. Use a soft-knee setting on the attack and set it to a lazy 40 to 70 ms so the compressor doesn’t clamp down on the signal immediately. If you’re using a plug-in, automate the threshold so it’s higher than the average level of the track but lower than the dramatic peaks. As an alternative to compression, ride gains during the mix by using automation. By just grabbing notes that stick out, you can avoid introducing the sonic signature from an extra plug-in or device onto the overall track.
VIBING WITH ‘VERB
Now that you’ve panned, EQ’d and dealt with dynamic issues, it’s time to play with your strings’ ambient quality. Because reverb is sustained over time, it tends to build up energy that can mask such tonal issues as the transient detail of the bow crossing the strings. (For more reverb ideas, see “Power Tip” on this page.) However, you can preserve tonal and transient string detail while still giving the parts a unique ambience and creating the illusion of a wetter track: Use the reverb to accentuate the ends of phrases and key notes where the ‘verb will be most obvious and de-accentuate it where strings are playing sustained notes.
First, using the ends of phrases where there is a pause, find a reverb level where the volume of the effect doesn’t overpower other track elements. Use the reverb to bridge these gaps over rests — where there is a “hole” in the part. This level will be where the reverb returns during the “breaths.” Then find a lower level for sustained sections where the reverb is audible but not overpowering the detail and “resin” sound of the bow. You’ll need to apply at least a minimal reverb here to ensure a smooth transition between sections with varying levels of ‘verb treatment. Then roll the track from the top with the send automation in Write, raising and lowering the levels throughout the track, accenting chords, hooks and dry sections with more reverb and lowering the effect during sustained sections. This way, you’ll have the best of both worlds: a track that has a unique ambient signature without the reverb being too big of a player.
While reverb can be a beautiful addition to a track, it is sometimes appropriate to leave a track completely dry. Lack of artificial ambience or effects brings the instrument directly to the front of the mix, giving the part an intimacy and urgency that can add to the drama of the song. This technique works especially well with a single instrument when juxtaposed against a single vocalist, or even a single player set against a group of singers. The dryness of the tracks will focus attention specifically on the track and not on the effect. This technique can cause a dramatic mood shift when ordered after other tracks on the album that are wetter, or against other sections of a single song that have more reverb.
By using these incremental techniques to polish your string tracks, you can achieve results that are far beyond the simple sum of the parts. By creating or enhancing spatial variety, ambience and tone through panning, reverb and EQ, strings can sound like a section recorded in a rich environment, adding warmth and depth to your mix.
Mix technical editor Kevin Becka would like to thank Gary Paczosa and Mark Cross for their contributions to this feature.
BEFORE YOU MIX
When layering string tracks, achieve variations in instrument sound by setting up mics at varying distances and angles from the player.
USING “A, T & T” TO INDIVIDUALIZE LAYERED PARTS
When you need to create many layered parts from a single player on one instrument, it’s easy for your finished “section” to sound one-dimensional. Break up this tonal monotony by varying ambience, tone and timing. By using standard recording techniques, you can introduce variances in timbre, room sound and timing to the parts as you record or even afterward during the mix. This way, you will introduce individuality in the parts, making them easier to distinguish and adding a richness of tone lost through repeated layering of the same instrument.
When layering a single player, use two different mics with different recording chains. Choose mics that display different personalities; for instance, one omni and one cardioid. The omni will capture more of the room, while the cardioid will sound tighter and more intimate. Achieve more variations in tone by setting the mics up on either side of the instrument: one at 2.5 feet above and the other at 3.5 feet above the instrument. (See diagram at right.) For more flavor, try one tube preamp and one solid-state unit; the tube preamp will exhibit more 2nd-order distortion while the solid-state will be cleaner and more clinical.
Alternate takes between rigs as you stack your parts. Vary mic placement on every second or third pass by increasing or decreasing the distance from the instrument, or put them on opposite sides of the instrument. Remember, while interrupting the session to move mics may give you more tonal variance, session flow is king. If players are in the “zone,” don’t interrupt the creative energy in favor of tone. Sacrificing performance and player well being to satisfy your audio sweet tooth is never a good idea.
If someone else cut the tracks, you still have some options. Slide some of the tracks back or forward in time a few milliseconds on the timeline using timing differences to mask some of the “sameness.” Or, vary EQ on the parts: For example, boost 8 to 10k on a shelf to make some parts brighter while warming up others by adding 100 to 300 Hz with a wider Q setting of 5 to 7.
— Kevin Becka
POWER TIP

Adjust reverb room parameters to create a “space.”
CUSTOMIZING STRING REVERB
Reverb is the mixer’s best tool to create ambience for any instrument or soloist in a track. You can simply create an ambient space by calling up a reverb’s preset — usually titled after a specific room, such as Warm Hall — and then adjust the room’s dimensions to match the size space you want to create. Additional parameters can make the “room” sound more complex through added delays and reflections: Pre-delay is the amount of delay before the reverb reflections start. Early reflection localizes reflective surfaces in a room and can define materials like curtains, wood and even multiple diffuse reflections such as seating. Modulation is a complex algorithm that models air movement in a room, simulating complex and random patterns in a space. Base the setting of each parameter on the application and type of music. In general, a string section in a spare vocal ballad can benefit from deeper reflections, more pre-delay and modulation because the strings and vocalist are not competing with many other mix elements.
However, if the song has a fast tempo and the string section is competing with both vocals and a band, then give the strings a more immediate, intimate sound by gluing the reverb to the track: In your reverb’s Parameter pages, turn off the early reflections, set the pre-delay to zero and add more modulation by turning up the amount in the mix. Adding modulation slightly detunes the track, while lowering pre-delay and early reflections marries the effect to the track, making it sound less wet. The effect of reducing reflections and delay in your reverb while increasing modulation will also provide tonal variance that will richen timbre, giving your mix more dimension.
— Kevin Becka
Troubleshooter
Use spectral editing software to remove clicks.
WAITER, THERE’S A CLICK IN MY RECORDING
One of the hardest things to deal with when mixing strings is eliminating the clicks that can sneak onto the tracks during the recording session. When players are recording, it’s not uncommon for them to leave one side of the ‘phones off the ear so they can hear pitch and timing cues from the other players or hear their own instrument better in the room. Of course, with a few open mics in the room and mic preamps cranked to pick up string nuance, the click will be audible in the speakers. While the click may be audible early in the session and easy to fix by lowering the cans, the sound can be even more insidious when stacking a single player: The click may be below the noise floor on the first few passes, but when tracks are layered, energy doubles each time, making the noise more audible as you continue.
The good news is that a leaked click is not usually a problem when there are a lot of elements in the arrangement, such as drums, guitar, etc. But when the strings are more exposed, the click can become quite audible. The first line of defense is an artful fader move: At the end of a section or phrase, instead of fading supportive instruments completely out of the picture, let them hang a bit longer to mask the click. If the strings are still exposed and there is an audible click or two during a decrescendo, then you may be able to go in on some of the tracks — provided that they are separated and not submixed to stems — and duck them when the click is most apparent. Ducking selected parts will be less noticeable than a fader move across the section. A DAW makes this trick easy because you can zoom in and see the click and then draw in a very narrow fader move.
If the above techniques are lacking, luckily for us click-challenged mixers, there are some great spectral-editing software tools to remove specific frequency-domain information from any recording, even after it’s mixed. Cedar’s Retouch, Algorithmix’s reNOVAtor or Adobe Audition’s Frequency Space Editor have intuitive interfaces that use color to flag different audio frequencies in a recording. With this process, coughs, sneezes, bow squeaks or clicks can be quickly identified and replaced with surrounding sonic information, in effect removing the noise from the track.
— Kevin Becka
LISTEN:
Podcast with Gary Paczosa
READ:
More information on “Recording the Band”
Related Articles
The Inside Track: Mixing Drums
Jan 1, 2007 12:00 PM, By Kevin Becka
Mix is proud to introduce a new article series for 2007: the Inside Track, a bi-monthly feature by Mix technical editor Kevin Becka that explores the…
The Inside Track: Mixing Vocals
Mar 1, 2007 12:00 PM, By Kevin Becka
A well-mixed and -sung lyric is the emotional centerpiece of any song. But because of the complexity of pitch, tone, nuance and lyrics, vocals need the…
Speech and Song
Nov 1, 2005 12:00 PM, By Kevin Becka
We all know that voice is king. Of the six instrument categories we’ve explored in our Recording the Band series, the voice is arguably the most powerful….
Hellacious Horns
Sep 1, 2005 12:00 PM, By Kevin Becka
English conductor and obvious curmudgeon Sir Thomas Beecham said, Brass bands are all very well in their place outdoors and several miles away. But don’t…
Killer Keys
Jun 1, 2005 12:00 PM, By Kevin Becka
Guitarist Andrs Segovia said, The piano is a monster that screams when you touch its teeth. At the extreme, this is true, as anyone listening to pianist…
Guitar Greatness
Mar 1, 2005 12:00 PM, By Kevin Becka
The guitar has defined generations of music since its rise in popularity in the mid-’50s. Trailblazing players such as Chuck Berry, Jimi Hendrix, Jeff…
Percussive Perfection
Jan 1, 2005 12:00 PM, By Kevin Becka
This feature marks the first installment of Mix’s six-part Recording the Band Series by technical editor Kevin Becka. In these bi-monthly articles, Becka…
Inside Track: Mixing Guitar
Jul 1, 2007 12:00 PM, By Kevin Becka
The words and go hand in hand. Along with a well-conceived and -played part, a well-crafted mix draws the listener in and sells the tune, whether it’s…
LISTEN:
Audio clips to help your mix sing!
SPEECH AND SONG:
Click on links below to download .WAV files to hear the New Camaldoli project, recorded by Kevin Becka and Glen O’Hara, in surround.
These four .WAV files (labeled accordingly) should be panned discretely to LF, RF, LS and RS speakers with the levels set to nominal for all four channels.
PERCUSSIVE PERFECTION:
Click here to download .WAV files of a Grado Vectored Array recording, a Holophone recording and a clip of Tony Morra’s drum sound, and hear an MP3 clip from Skid Row’s self-titled debut, as featured in our sidebar, “Michael Wagener, Skid Row and a Really Big Tracking Room.”