The guitar has defined generations of music since its rise in popularity in the mid-’50s. Trailblazing players such as Chuck Berry, Jimi Hendrix, Jeff Beck, Keith Richards, Stevie Ray Vaughan and U2’s The Edge have inspired legions of music lovers to identify with this instrument, more than others in the band. It makes sense that this portable music-maker has had this effect, because it seems like most everyone has held a guitar in his/her hands and can play it with varying degrees of skill (or pretend to with an air guitar). How could anyone not like it? It’s one of the few instruments that “sings,” much like a human voice — captivating as a solo or as part of the ensemble, a team player and diva in one instrument.
Miking each driver in a dual-speaker cabinet leads to more tonal options in the mix.
photo: Chris Bailey
Recording guitar can be a lot of fun, especially if it involves that magic combination of a great instrument, a great player and great equipment with which to capture them. However, the challenge often lies in knowing when to draw the line between tweaking the tone to your artistic vision and knowing when to leave well enough alone. The instrument has many hues: On the acoustic side, a guitar can be steel-strung (round-wound, half-round or flat-round) or nylon-strung — exhibiting a more ethnic or classical side — and comes in a wide variety of sizes and woods offering many tonal variations. The electric options include hollow, semi-hollow and solid bodies, which lend themselves to a variety of musical styles from jazz and blues to country, pop, R&B and rock. Even the type of pick used can alter attack, tone and feel of the part. To add to the spectrum, myriad pickup designs, stomp boxes, Pod-type interfaces, active electronics and string benders have emerged during the past 50 years of guitar evolution. If that weren’t enough, instrument variations include baritone, dobro, high-string, guitars with more than six strings and alternate tunings. And we haven’t even begun to talk about using amps, DIs, splitters or re-ampers, or the ways you can tweak a raw guitar track in the virtual world in a DAW. As you can see, this is a deep subject.
INSTRUMENT SETUP
The one truth that rings throughout our “Recording the Band” series is that it all starts with the instrument. No matter how you treat the track with miking, mixing and effects, getting it right at the source makes it easier to achieve the killer sound that sets you apart from the crowd. For starters, setting up the guitar is essential for intonation, tone and making the player comfortable. This need not be an expensive proposition as a lot can be done on a do-it-yourself basis. Let’s start with the tools you’ll need: various-sized screwdrivers, hex and socket wrenches, wire cutters, feeler gauges (like those used for setting spark plug gaps), string winder, nut tools (needle files for cutting slots for strings), bridge radius guides (for setting up a Fender bridge) and, lastly, a neck block and soft table cover for cradling your baby while you work. Of course, there’s a wealth of information about this topic online — you’d be amazed at how many full setup and maintenance tutorials you’ll find just by Googling “setting up your guitar.”
When miking an amp’s speaker cone, orient the mic slightly off-center.
photo: Chris Bailey
If the D.I.Y. route is not for you, your local music store is a good place to to start, where you can find a pro who can get your instrument in top shape. A guitar’s setup varies from player to player and takes into account the chosen string gauge and personal preference as to action and feel. Letting your chosen tech set up your preferences is a win-win situation: It will make you happy and keep you coming back for more.
On the electric side, keeping noise down can involve having the instrument properly shielded by a pro who knows the ins and outs of correct grounding. It’s important to note that grounding is nothing to leave in the hands of an amateur! In this case, working with a trusted professional can save your life. During the session, if noise is still a problem, a simple slight repositioning of the player (i.e., swiveling him in his chair) can greatly reduce the hum associated with certain guitars in the studio and live environment.
Whether you’re working with acoustic or electric guitar, once the instrument is set up properly, changing the strings before the session will help produce the best results for tone and consistent tuning. (See “Tuning Perfection” sidebar on page 38.) Needless to say, spending so much time getting the guitar, amp and signal chain set up means nothing if you use cheap cables between your guitar and amp. Cabling does make a difference. Your signal chain is only as strong as its weakest link.
AMPS AND ELECTRICS
Various miking techniques — some traditional, others not — can be used for accurately capturing the desired tone of a guitar amp. But before the mics are placed, making sure your amp is in top condition is a must. A properly biased tube amp will play louder, sound better and lengthen tube life. Bias is a negative voltage sent to the tube that makes it operate to its full potential and is an adjustment that must be made both when changing tubes and as they wear out over time. (A solid-state amplifier has none of the issues associated with tubes.) More info on tube bias can be found at www.diyguitarist.com.
On acoustic guitar, try various spaced-pair mic locations for tonal variety.
photo: Chris Bailey
Dynamic, condenser and ribbon mics all work extremely well for miking an amp, but before placing a mic, locating the speaker in a cabinet with a fixed grille is essential. Shining a flashlight at an angle while looking through the cloth will give you a good idea of where the speaker resides. Then, a small piece of white studio console tape can be put on the cloth at the center speaker position to keep the mic angle and location in the proper perspective.
The center of the speaker is not necessarily the best place to orient the mic; instead, place it closer to where the center dome (dust cone) meets the outer cone. For further tonal variations, the mic can be turned off-axis from center or can be moved further away from center, toward the outer edge of the speaker. Using the combination of a dynamic mic and a condenser can give you more tonal fodder for the mix. They each impart their own tone, depending on the source. This setup can be used on one speaker or on a second speaker if available, and then mixed to one track or kept separate. Be sure to keep the mics equidistant from the source for the best phase coherence.
To add even more variation to your tonal palette, place a mic at the back of an open cabinet or mike the room. The mic at the back of the cabinet can be moved around to taste, and then mixed with the front mic. Sometimes, flipping the polarity of the back mic will offer more pronounced low frequencies due to the improvement in phase coherence. To add ambience in the mix, try incorporating some room sound. Mic placement can be anywhere from five feet back or further depending on how big you want the sound and what the room offers. Generally, dead rooms offer little interesting interaction. Having the mics closer to the floor will give you more pronounced low end.
Another trick involves close-miking the strings of a solid-body electric guitar and miking the amp. This renders the glassy sound of the pick on the strings, which can be mixed in to taste with the amp tone.
Using a DI, such as the REDDI Tube Direct Box from A Designs, expands your tracking (and processing) options.
photo: Chris Bailey
Although there’s nothing like a speaker moving air, special considerations must be made for recording in spaces where there are concerns about disturbing the neighbors. The Demeter SSC-1 Silent Speaker Chamber offers a solution. A sturdy insulated box made of marine-grade ¾-inch plywood that houses a 12-inch speaker, it includes an adjustable built-in mic stand with XLR output and ¼-inch input jacks on the exterior. This “doghouse” allows you to crank the amp and move the air without waking the dead.
Another way to capture maximum tone while maintaining low SPLs is to use a power soak between the amp and the cabinet. The idea behind the product is to properly load the speaker but to have some control over the total SPL exiting the cabinet. This can be hard on a tube amp, so some research is in order. The most extensive pool of info I’ve found on the topic is at www.amptone.com/powerattenuatorfaq.htm.
ACOUSTIC ALCHEMY
Recording acoustic guitar offers many opportunities to use traditional and non-traditional miking techniques. The standard X/Y, M/S and ORTF arrays work very well for this, each offering a different tonal flavor. (See Mix‘s Seminar on Demand on recording guitars at www.mixonline.com for more specific info.) You can also use spaced pairs pointed at various locations on the guitar, depending on the tone being sought. The rule is that more of the string tone comes from where the body meets the neck, where the area around the bridge renders more pronounced low end. This can be mixed to mono or spread across the speakers as wide as you’d like.
Engineer Greg Ladanyi’s technique for recording acoustic guitars (see “The Story Behind the Sound” sidebar below) is to place the mic where his ear hears the sound. He simply moves his head around the instrument, assesses the tone and then puts the mic where his ear tells him to. Then he places the mic anywhere from three to five feet away from the instrument, depending on how close he wants it to sound and how much room he wants involved in the final mix. Another of Ladanyi’s tricks is to use a close mic near where the fingers are picking the strings, then another mic about three feet from the front bottom end of the guitar body. He then EQs the low end out of the close mic, using that track for the definition of the strings, and lets the other mic add the low end. These tracks are then all panned to one position.
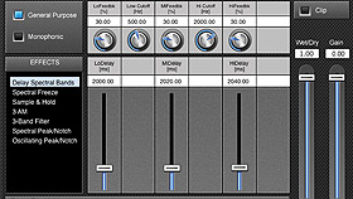
Amp-modeling plug-ins (such as UA‘s Nigel) let you change your instrument‘s tone anytime.
Another interesting technique is to mike the guitar at close range in a vertical X/Y configuration: One mic is pointing up away from the soundhole while the other is pointing down. This technique yields a more centered stereo image than when placing mics in a horizontal plane. An ideal mic for this technique is a fixed stereo mic such as the RØDE NT4, the AEA R88 or Royer SF-24. One thing to keep in mind when using a standard ribbon mic for this application, or any instrument, is that ribbons need a lot of gain and might not lend themselves to a softer sound, such as a lightly finger-picked part. If this is the case, a preamp offering a lot of clean gain will be needed to keep the noise floor at bay. Active ribbons such as the SF-24 do not have this limitation.
DI BOXES, RE-RECORDERS, EXTENDERS AND SPLITTERS
While using a DI on a guitar is often thin-sounding and inadequate by itself, it can be mixed with the amp tone for an interesting tonal variation. This technique became part of Mark Knopfler’s signature Strat sound on the early Dire Straits records. (See “Case Study” sidebar on page 34.)
DIs come in a variety of flavors, from tube or FET active models to passive transformer models. The active models often supply enough gain to allow the DI output to be plugged directly into a line-level input, which can render a cleaner signal.
Even if it’s not used in the mix, a well-recorded DI track will allow you to re-record the guitar track at a later session, so you can experiment with more mic and amp options at another time. For instance, a box such as John Cuniberti’s REAMP (
) is an inexpensive way to change your tone after the guitar has been recorded. The box takes a low-impedance signal and jumps it back up to high impedance. This high-impedance output can then be plugged directly into a guitar amp and re-recorded. Various products from Little Labs, Millennia and Radial Engineering offer this ability, often in the same box as a DI.
A dry guitar track recorded to a DAW through a DI also gives you the ability to use an amp-modeling plug-in such as Line 6’s Amp Farm or IK Multimedia’s Amplitube. These plug-in options give you more tonal muscle and can quickly be swapped out and saved with the session. A nice twist on this technique is to record a clean guitar through an amp and then process that through the modeler. This trick gives you the speaker compression and benefits associated with recording through the amp, which translates nicely through the plug-in.
Having the guitarist play inside the control room rather than next to a screaming guitar amp can give him a sense of being in the mix, not to mention save his hearing. With a separate amp head and speaker cabinet, cable length is not an issue, so a speaker-level run is an easy thing to accomplish and tone is unaffected by long runs. However, when recording with a combo amp, making a long instrument-level cable run results in loss of signal and tone. New products from Radial Engineering and Little Labs address this problem, allowing the player to have his cake and eat it, too. The Little Labs STD instrument cable extender and the Radial Engineering SGI both allow the transmission of instrument-level signals over a standard mic cable for hundreds of feet.
When multiple amps are available for a recording, a splitter will allow you to run instrument-level signals to all of them. The Little Labs PCP Distro (
) is a three-way splitter that not only lets you send an instrument-level signal to different amps, but it also allows you to insert line-level gear across your signal path before the amp. Once the signal is split to different amps, those amps can be miked up and recorded to their own tracks. For a splitter that does it all, check out the Millennia TD-1, a splitter, DI, mic preamp, power soak and EQ.
THE POWER OF PROCESSING
As I said in the introduction, it’s important to know when to draw the line between tweaking a guitar track to your heart’s delight and leaving well enough alone; however, sometimes it takes some time-based trickery to make one-dimensional guitars speak in the track. Apart from the myriad stomp box tone-manglers available from any number of manufacturers, there are some basic processing tricks that have graced many records during the years. Engineer Ladanyi uses multiple delays spread across the stereo field to make his guitars sound bigger. Another trick is to use a stereo harmonizer to change the pitch of and delay the signal. Feed your guitar from an auxiliary into a basic harmonizer such as Eventide’s H Series hardware processors, which is also available as a software plug-in. The basic settings provide for left and right delay in milliseconds and left and right pitch change in cents (
1
/
100th
of a semitone). Pitching up one side 10 to 15 cents while pitching down the other side an equal amount, then adding 10 ms of delay on the left and 15 ms on the right will give a mono guitar a nice spread. These numbers are arbitrary and should be adjusted to taste.
Ping-ponging delays is another old-school trick that’s easy to reproduce. Bring up two mono delays panned left and right, then set to quarter- and eighth-note delay times, then feed them back onto each other through the same aux sends. This causes the delays to repeat back and forth across the speakers. The amount of feedback and length of bouncing effect is set by the amount sent to the other side. A quick way to find quarter- and eighth-note delays is to get a stop watch that reads out in
1
/
100th
of a second and has a split-time feature. Start the watch on beat 1 of any bar, capture a split time on beat 2 of bar two and again at beat 3 of bar three. These two numbers are your delay times.
AFTER THE SESSION
As I mentioned earlier, using various amp-modeling plug-ins on the guitar tracks recorded into your DAW allows you to change the instrument’s tone after the fact. One nice trick is to use a multimono version of these plugs to have different amps and parameter settings for each speaker. Multimono plug-ins are multiple instantiations of the same plug-in across any number of audio streams, stereo and up. Although the plug-in (and associated DSP load) is multiplied across the channels, the user is presented with a single interface that can be run linked or unlinked. The strength of this technique involves unlinking the plug-ins via the master unlink button (twin intertwined circles at the top and center of the plug-in). Once this is done, you can call up each individual channel with the pulldown marked L, R, C, etc., and change the amp choices and parameters. Although you can’t re-link the plug-ins with the same master unlink button without losing the individual settings, there is facility to individually link channels to other channels by highlighting the small squares above the channel choice pulldown. This way, you can change individual amp settings, for instance, and then link the channels to change volume or distortion across all channels.
THE FINISH LINE
Don’t forget, for more basics on miking, be sure to visit our Seminar on Demand. As you go into the mix, keep in mind that guitars — especially tracks playing sustained, distorted chords — can eat up a lot of real estate. A razor-thin line separates making the track sing and obliterating vocals or other important mix items. The biggest benefit — and challenge — of recording guitar is that you can create endless tonal variations anywhere along the path.
By choosing the right pick, strings, amp, pickups, body design and, yes, even the player, you can build yourself the perfect beast and make your mark on the next generation of guitar lovers.
Mix
technical editor Kevin Becka would like to thank Greg Ladanyi, David Rideau and Chuck Ainlay for their help in researching this feature
.
CASE STUDY
Chuck Ainlay, Mark Knopfler and a Minimalist Style
Nashville engineer Chuck Ainlay’s work with guitar great Mark Knopfler involves minimal processing. “Mark is a minimalist as far as processing,” says Ainlay. “He doesn’t rely on pedal effects or much outboard gear to achieve the amazing sounds he gets. It’s all about his technique. In fact, the more processing you do, the less unique he becomes. For him, it is about selecting the right guitar, an amp and then the right mics in the appropriate room.”
Chuck Ainlay
Ainlay tried using compressors on his guitar, which resulted in Knopfler playing harder as the compressor was pulling him back. Knopfler thought there was something wrong. Once the compressor was removed, Knopfler could “feel” the track and his performance much better. Experiences like this have resulted in the minimalist style they’ve developed together over several projects.
Knopfler’s approach involves selecting the right guitar and amp, while Ainlay selects the right mics and places them appropriately. Basic tracking is done entirely live with a band, but when overdubbing, Knopfler prefers to work from the control room so he can hear the guitar in the proper perspective of the mix. Knopfler’s vintage amp collection is extensive and includes boxes from Marshall, Vox, Fender, Tone King and Victoria. He also uses a Komet designed by amp guru Ken Fischer. Other interesting tones have come from not-so-great instruments from Silvertone, Teisco or Eko played through a Selmer or some not-so-vintage amp.
On the amp, Ainlay uses a Shure SM57 with a Neumann U67 or the SM57 with a Royer 121 as the close mics. “Mark’s distinctive style is very ‘in your face,’” says Ainlay, “so we don’t mike the room as a general rule, but we do when that’s the desired sound.”
Ainlay rarely ever mikes an electric cabinet directly on the center of the speaker. Instead, he tends to mike closer to the edge, angled in toward the middle. He’s found that it sometimes helps to lift the cabinet off of the floor by putting it on top of a road case. He will sometimes mike the rear of an open-back cabinet and reverse the polarity of that mic to mix in with the front mic.
He strays from the traditional when recording Knopfler’s acoustics, using close mics, distant mics, mics inside the guitar, X/Y, M/S and DIs. During tracking, Ainlay places a DPA 4011 where the neck joins the body and then a DPA 4061 miniature mic inside the guitar. Because Knopfler usually sings a guide vocal when tracking, and his guitar is often a keeper, the inside mic gives him a fair amount of isolation from the vocal leakage.
For the recording medium, Ainlay prefers a hybrid approach of tracking analog and then transferring to 96k digital in Nuendo. The rest of the recording is carried out on the hard disk until the mix, which is done on an analog desk. Ainlay shies away from using EQ, instead making sure the sound is captured accurately on the front end, adjusting tone using mic placement and pickup or amp settings. As far as time-based effects, Ainlay prefers delays instead of reverbs; however, he says that he recently fell in love with the UAD-1 EMT 140 plate reverb, which he calls “the best plug-in reverb I’ve heard.”
—
Kevin Becka
THE STORY BEHIND THE SOUND
Greg Ladanyi Recording Jackson Browne’s Hold Out
Engineer Greg Ladanyi’s work with Jackson Browne and his guitarist David Lindley are some of the best examples of guitar recording done in the past 30 years. Lindley’s biting, beautiful tone was expertly captured on Browne’s
Hold Out
album, released on the Asylum label in 1980. In particular, Ladanyi’s work on the single “Boulevard,” which reached Number 19 in
Billboard
‘s Hot 100, created a signature guitar sound that imprinted this song into the memories of a generation of music lovers.
Hold Out
was done at Record One studios in Sherman Oaks, Calif., on an API console. Browne’s early bands featured such studio stalwarts as Russ Kunkel (drums), Danny Kortchmar (guitar), Lindley, Craig Doerge (keys) and Bob Glaub (bass). The band recorded as a unit and solos were added later — that is, if Lindley didn’t nail it on the tracking date, which did happen.
Ladanyi captured Lindley’s Vox amplifier using a Shure SM57 up close on the cabinet and a Neumann U67 about five feet back, and recorded both to one track. In addition, Ladanyi recorded a room mic to a second track. To get the full tone and stereo spread heard on the record, he used four delays, set at approximately 16 ms, 30 ms, 45 ms and 65 ms, then panned these across the stereo field and recorded them to a stereo pair of tracks. In general, rather than wait until the mix to perform this trick, Ladanyi’s approach is to create the sound of the record as he’s making it and commit it to tape.
When working with Lindley, who is renowned for his large collection of various guitars and amps, Ladanyi did little to change the sound once Lindley dialed it in for any particular song. He says that the guitar sound on the track “That Girl Could Sing” (also from
Hold Out
) required minimal processing, and the tone of the record is pretty true to what came out of Lindley’s amp.
—
Kevin Becka
Tuning Perfection
The technology of making the guitar sound “right” has evolved beyond the tweaking one can do with standard tools and techniques. Traditionally, a guitar is slightly out-of-tune from chord to chord, but the Buzz Feiten Tuning System (
) puts the neck in tune no matter which chord you’re grabbing. This is available on new guitars or as a retrofit on an existing instrument. I’ve played a Martin acoustic fitted with this tuning system and it is uncanny how in tune it sounds over a range of chords and scales. Another novel approach to getting and keeping a guitar in tune comes from TransPerformance Guitars (
), which uses a series of motors, detectors and software to tune the guitar. It also facilitates jumping between alternate tunings quickly.
—
Kevin Becka
Mix presents: Seminar on Demand!
for our in-depth audio/video on recording guitar.
for audio examples
of Chuck Ainlay’s work with Mark Knopfler, and Greg Ladanyi’s miking of Jackson Browne guitrist David Lindley.
For Greg Ladanyi’s tips on compression and working in DAW,
.
How does
guitar great Joe Satriani
get that killer sound live?
to find out.
Useful Web links: