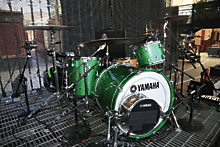

For many engineers, the most difficult aspect of a live mix is the drum sound. In most situations, miking the drum kit requires patience, a gaggle of mics and cables, and attention to the style of music. Well, fear not intrepid engineers — drum miking isn’t rocket science. But you will need to think about how the kit plays into the rest of the onstage sound. I’ve compiled a slew of tips and techniques on properly miking the kit to take the guesswork out of placement and keep your focus on the mix.
Photo: Steve Jennings
ACHIEVING A BIG BOTTOM
My favorite kick drum mic is the Audix D6 placed just inside the hole, pointing at the beater. (See Fig. 1.) I might move the mic a bit farther inside, but this is a great starting point. As the mic is moved closer to the beater, you typically get more “smack,” but less “woof.” Some engineers will use an outside mic such as the D6, a Shure Beta 52 or a Beyerdynamic M88, with a second mic placed inside the drum, such as a Shure Beta 91. The outside mic captures the low end, and the inside mic captures the smack of the beater. A bit of Velcro on the back of a 91 keeps it from moving around after you’ve placed it atop a pillow or small blanket.

Figure 1: An Audix D6 placed inside the hole, pointing at the kick’s beater
Photo: Steve La Cerra
If you like this idea, then check out the Audio-Technica AE2500, which employs dynamic and condenser elements placed side by side under a single head grille for maximum phase coherence. When adding a second mic on a kick (or any instrument for that matter), check the phase or polarity between the two. If you find that the kick is too boomy, then lay a bath towel or small pillow inside the drum so that it is just touching both heads, or you can purchase one of a zillion products designed to do this. But don’t stuff the kick drum full of padding because you’ll kill the tone.
The next most important element of the kit is the snare drum, and it’s tough to go wrong with a Shure SM57 or another recent popular choice, the Audix i5. These are cardioid mics, so place them with the rear of the mic (where the cable enters the body of the mic) facing the hi-hat for maximum rejection of the hat. (See Fig. 2.) If your tastes steer you toward a mic with a hypercardioid pattern, place it so that the two null points face the hat and the rack tom.

Figure 2: Proper position for a cardioid mic on a snare
Photo: Steve La Cerra
Adding a second mic for the bottom of the snare is a highly debatable subject: On the one hand, a bottom snare mic captures the sizzle of the snares and adds presence to a dull-sounding drum. However, if the drum sounds great to begin with, you may not need a bottom mic. Because the bottom snare mic is typically out of phase with the top mic, it can create more phase problems than some engineers feel it’s worth. Even if I don’t always need that bottom mic, I’m paranoid and want it there in case the top mic fails (which has never happened).
Personally, I’m not too picky about a mic for snare bottom, but some engineers prefer a cardioid condenser placed a few inches from the bottom head, either directly pointed at it or at a slight angle to the bottom head. In either case, always check the phase between the bottom and top mics. If you use a condenser on the bottom, switch on the pad to prevent overloading the mic’s electronics and use the highpass filter to reduce leakage from the kick.
THE TOM TOM CLUB
Most drum kits have only one snare drum but several toms, and you don’t want one of the toms to have a different timbre, so use the same brand and model of mic on all toms, or at least the rack toms. Likely suspects for tom mics include the Audix D2, Shure Beta 98, Sennheiser e604 and MD-421, Beyerdynamic M201 and Electro-Voice N/D468. Keep the mics out of the drummer’s path so that the drummer can get around the kit easily and the mics don’t get damaged. For floor toms, you can go with one of the previously mentioned mics or — if you’re looking for a bit more bottom — try an Audix D4 or AKG D-112.
Placing a mic on a floor tom is tricky when the drummer’s ride cymbal sits directly above the tom. Try to aim the null point of the mic’s pickup pattern at the ride cymbal to reduce leakage. Be aware of the angle of the tom mic to the drum head; some engineers will place the mic extremely close (within an inch) and point the mic so that the diaphragm is parallel to the drumhead. The low-end response suffers because the mic is not capturing the entire surface of the head. Instead, point the mic so that the diaphragm is at an angle of roughly 40 degrees and aimed at the center of the head. Placing the mic within two to three inches of the head will reduce leakage because getting closer to the source enables you to reduce gain on the console, effectively making unwanted sounds softer. It also takes advantage of the proximity effect exhibited by most directional microphones. When possible, face the tom mics in the same direction so that sound in a tom’s main mic is in phase with the leakage reaching another mic.
A CYMBAL OF MY AFFECTION
There are two approaches to overhead mics on a drum kit. The first employs the mics for picking up the cymbals. The second uses the overheads to capture the entire kit while the remaining mics function as “spot” mics. In either case, placement is similar and the difference comes in the mix, where you roll the low end out of “cymbal” mics but keep it in “overhead” mics.
Typical placement for directional (cardioid or hypercardioid) overhead mics is one over each side of the kit, approximately six feet high, pointing either straight down to the floor or angled toward the center of the kit. In some instances, it may make sense to angle the overheads slightly toward the audience to increase rejection of the drum monitors. The higher up you place the overhead mics, the better the blend of all the cymbals. On a large stage with a high ceiling, try seven to 10 feet. Be cautious of creating hot spots in hypercardioid overheads, especially when pointing them straight down to the floor. Most drummers place their “effect” cymbals on the extreme sides of the kit, and, because they tend to be really loud, it’s better if these cymbals are off-axis to the overhead mics.
On a really large kit, a third mic directly in front of the drummer helps prevent a “hole in the middle.” Adding a spot mic on the ride cymbal is a good way to make sure that the “ping” of the ride cuts through the mix. This mic can be placed on top or underneath; I prefer the latter because it makes it less likely to pick up other elements of the kit and keeps it unobtrusive. It’s a good idea to switch on the mic’s most severe highpass filter or dump the low end out at the channel.
OMNI IS NOT A FOUR-LETTER WORD
One approach you can take if you have the mics, stands and console channels is to place a mic underneath every crash cymbal. Omnidirectionals are probably best in such applications as you’ll be very close to the cymbal and a directional mic will sound “swishy.” Although the cardioid pattern has traditionally been the choice in onstage miking, omnis can be placed much closer to a source without creating a hot spot or proximity effect. For example, a pair of Earthworks TC30Ks can be set to a lower height while maintaining smooth response, capturing all of the kit without creating much leakage.
Favorite overheads include the Earthworks TC30K, Shure SM81 and KSM32, AKG C-414 and C-451, Audix SCX-one-c, Audio-Technica AT4050, Neumann KM184 (KM84 if you’re lucky enough to have a pair) and Beyer M160 ribbons. Because none of these mics likes to be beaten with a stick, take extra care to keep them out of harm’s way. During soundcheck, check phase between overhead, kick, snare and tom mics. Even if I’m going to dump the low end out of the overheads, I’ll start with them full range, add in the kick mic and flip the phase of the kick in and out while listening for a change in the low end. Ditto for the snare drum and toms. Sometimes the overheads have to be phase-reversed.
A FEW NOTES ON THE HI-HAT
It boggles my mind that some people will mike a hi-hat from the bottom. This produces a clunky sound, doesn’t capture any attack from the stick and, in most cases, is a far cry from what the drummer is hearing. Any of the condenser mics mentioned for overheads will work equally well for hi-hat, placed three to four inches above the top hi-hat cymbal, at an angle of about 60 degrees. Keep the mic toward the middle of the cymbal; placing it near the edge will capture a lot of wind noise when the hat is closed and opened. Use the mic’s most severe low-frequency roll-off; you don’t need any bottom end on a hi-hat mic. Be mindful of the mic’s pickup pattern.
BEYOND ROCK ‘N’ ROLL
For a jazz kit, a simpler setup is often sufficient. Typically, I’ll put up a pair of cardioid condensers in X/Y stereo about six feet in the air, centered over the snare drum or directly above the player’s head. In this case, don’t roll the low end off of the overheads as they’ll serve to capture the toms and cymbals. Add spot mics for the kick and snare, and you’re done. In this case, the kick mic can be backed a few inches away from the front bass drum head. I’ve also had tremendous luck using a pair of Earthworks TC25Ks (omni), one pointing straight down between the snare and hi-hat, the other pointed between the floor tom and ride cymbal, about six feet in the air. Add to these a kick mic for a little boot in the bottom, and the drum sound is finished.
In addition to being Mix’s sound reinforcement editor, Steve La Cerra mixes front of house for Blue Öyster Cult.

READ: A great tip on miking drums onstage
Miking a kick drum can an easy task when there’s a hole in the front head. A 6 to 10-inch hole in the kick’s front head can increase your miking options drastically —but making that hole can be a scary prospect. If you have a steady hand, cut the hole using a clean, sharp razor blade. The DynamO from REMO® includes a cutting guide and a heavy plastic reinforcement for the edge of the hole (five to nine inches), but if you don’t like the idea of taking a razor blade to a brand-new ‘skin,’ then lay the drumhead on a large piece of scrap plywood with the collar up so that you are looking at the inside of the head. Heat a clean, empty coffee can over the stove until the can is extremely hot. Pick up the can using a pair of pliers and press the can firmly onto the head. It will burn a perfect circle through the head and leave a melted ring of plastic around the hole, which actually reinforces the edge of the hole. The hole should be far enough away from the bottom of the drum so that you are not pointing the mic directly at a pillow or blanket that the drummer might be using to dampen the drum.
