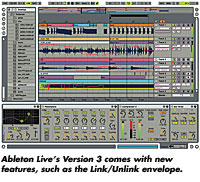
The fact that Ableton Live can instantaneously preview any .WAV,.AIFF or SDII file at any tempo with the click of a mouse withoutadditional slicing or preparation, combined with the software’scapability to run alongside Pro Tools (via ReWire) or function as adisk streaming software sampler, has made the product popular with bothfilm and television music composers and loop-minded producers. Now,Ableton has upgraded Live to Version 3.
LOOPS ETERNAL
Live 3’s new Link/Unlink envelope may be its most powerful button.Unlinking an envelope means that any given loop is no longer amonotonous, repeating loop, but rather an extendable or contractibleamount of time for each independent envelope. In other words, whileyour looped audio file goes ’round and ’round, Live enables you tocreate automation envelopes of any length, similar to the way an LFO orfilter modulation can cross bars and beats.
Say you are working with a two-measure drum loop and would like tocreate a longer, more interesting (i.e., dynamic) drum loop. To dothis, open the loop by double-clicking on it in Live’s Clip View. Next,make sure that Clip View’s envelope window is open, and that the DeviceChooser reads “Clip” and the Modulated Control Chooser says“Volume” (all default settings). Click on the Linked buttonso that it now toggles to Unlinked. To the right of the Unlinkedbutton, enter in the desired length for your new Volume envelope (forexample, 4,0,0 in the three successive boxes to designate exactly fourbars). Your sample region, visible on the right, will now be extendedto four measures and the original loop remains its original length.Next, edit the envelope by drawing in a volume curve. I often use thistrick to silence unwanted drum hits or parts of a sample, as well as toadd variety to a static loop. For instance, I may cut a couple of notesout in measures one and two so that bars three and four add a bit ofintensity. Keep in mind, this is a two-bar loop with a four-bar volumeenvelope working over the top of it. You can take this further byautomating the sends, panning or any other effect parameter, as long asit is active on the given track. Better yet, any automation pattern canbe cut, copied and pasted to any other clip or parameter.
DRAG TO REPLACE
This vanilla-sounding feature is easy to overlook; however, try itonce and you’ll be hooked. Here’s how it works: Now that you have setup a volume curve, drag another two-measure drum loop from Live’sbrowser to the previously edited loop’s Clip View. All settings andenvelopes on the original clip will now be superimposed onto the newclip. This tactic allows you to multiply your editing efforts. Forinstance, you have created a complex drum pattern with multipleUnlinked envelopes (as described above) and now you want to sampleanother drum sound with those same edits. By dragging your new sampleto any point on the original sample’s Clip View, even while the clip isplaying, you will immediately hear a brand-new loop. Note: Thisdrag-and-replace feature is different from Live Clip View’sReplace/Locate Sample, which will swap out all copies of the clip inquestion throughout your Live set.
DUPLICATE (SIMULTANEOUS COPY AND PASTE)
By pressing Ctrl (Cmnd) + D, you can duplicate almost anything inLive, be it a clip, loop, a group of loops or samples, or even thecomplex automation envelopes described above. You can also quickly copyand paste at once with this simple command. To duplicate a scene (a rowof clips in Session View), hold down the Shift key along with Crtl(Cmnd) + D.
RE-PITCH MODE
When a clip is in Re-Pitch mode, Live ceases to apply its magicalpitch correction (aka, warping) to your loop. If this sounds a littlecounterintuitive, then think of Re-Pitch mode as “old-schoolsampler” mode, where the clip changes pitch with regard to tempo.I use this mode as my default whenever I am recording into Live at thefinal project tempo. Live will then simply stream the recording fromdisc unaffected. I also use Re-Pitch to fatten up drum loops that arenear the tempo I am working in. For instance, if a drum set loop isrecorded at 95 bpm and I am working at 90 or 92, I will change theclip’s mode to Re-Pitch, thus producing more punchy and slightly lowerdrum tones with absolutely no warping.
REWIRE WILDFIRE
At the risk of sounding obvious, I want to stress that if you havenot tried linking Live via ReWire to Reason, Project 5, Orion, Logic,Pro Tools or any other ReWire application, you simply must do so now.(You’ve reached the end of this magazine, anyway!) It’s as easy asopening your desired master application first, designating the futureReWire inputs and then opening your slave application. Ableton’sWebsite (www.able ton.com) hosts several DAW-specific tutorials on howto set up ReWire. When running Live as the master, you can apply all ofyour VST effects to your ReWire slave application’s tracks, as well asrecord the ReWire input for creative tweaking inside of Live.
The author would like to thank Dave Hill Jr., author ofAbleton Live 2 Power! (www.brainboxing.net/abletonlive), for his helpin writing this piece.