The mainstream record industry traditionally has lived very much in the present, with the value of a recording only as high as its current chart position. But the crucial role that replacement sales played in the success of the CD proved that there is a significant market for music that is no longer on the charts (and perhaps never was). The reissue boom also brought to light how little attention had been paid to proper cataloging and preservation of recordings. It’s because past recordings are now seen as a source of future profits-not because of nostalgia or a duty to preserve cultural heritage-that there is some hope that major labels will make the ongoing investment required to preserve yesterday’s music for tomorrow’s listeners.
Major labels, however, are only part of the story. Since the advent of “artist power” in the late ’60s, control of more and more masters has either been retained by or reverted to individual artists and producers. No hard facts are available about the steps these individuals have taken to preserve the recordings in their care. But anyone who has been around the industry for a while would suspect that many (if not most) of these tapes are being stored in less than ideal conditions.
The basic purpose of preservation is to retard deterioration and/or to prevent damage. In the immortal words of the National Archives of Australia, “We cannot control the inevitable deterioration of materials, but we can control how fast it happens.” From a practical standpoint, we also need to ensure that we have the means to find and properly identify a stored recording when we need it, and the ability to recover or play back the stored audio.
Most individuals-or the studios where they leave their tapes-lack the resources of the major labels, and thus may not be in a position to follow through on an ideal preservation regime. Even so, many of the factors that influence the life span of a recording boil down to reasonable care and common sense, not just in storage but in how the materials are handled throughout the production process. So taking the time to raise your awareness of the issues involved, and acting on what you learn, can definitely improve the chances that your recordings will live long, productive lives.
For better or worse, long-term durability is rarely the guiding criteria when it comes to choosing a format. Factors such as sound, compatibility, convenience and cost tend to be the dominant priorities. But while the choice of formats has exploded-and their relative durability is hotly debated-it turns out that the enemies they face fall mostly into the same few categories. According to “The Care and Handling of Recorded Sound Materials” by Gilles St-Laurent of the National Library of Canada, “There are essentially only three concerns to consider when handling and storing sound recordings: that they be kept free of any foreign matter deposits; that they be kept free of any pressure that might cause deformations; and that they be stored in a stable, controlled environment.” We’ll look at each of these in turn, considering first the general case and then concerns related to specific formats.
KEEP IT CLEANKeeping a tape free of “foreign matter deposits” sounds simple enough. But in the rush of daily work, professional practices sometimes fall by the wayside. So it’s useful to remember that ignoring the basics-things like “wash your hands before handling tape,” or “don’t leave a tape out of the box when not in use”-can have detrimental consequences down the road. That’s because surface deposits diminish the longevity of whatever medium you work in, be it analog or digital, tape or optical.
The biggest concerns in this regard are dust, smoke and grease. Your work area should be vacuumed regularly to combat dust build-up, and preferably be a smoke-free environment as well. Eating or drinking in the area in which recordings are handled should be discouraged. Tapes or discs should be returned to their closed boxes or cases when not in use. To avoid graphite dust, use markers rather than pencil for labeling the media and its box. If the box is dusty, vacuum it before opening, using a vacuum cleaner with a hose to minimize the risk of magnetic field exposure from the cleaner’s motor. And, of course, the room’s air conditioning system should be equipped with dust filtering equipment.
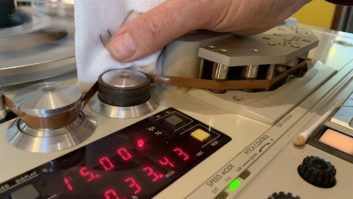
For formats using a cassette or cartridge (DAT, PCM-1630, ADAT, DA-88), there’s no need for physical contact with the actual recording surface. But extra precautions must be taken with both CD-Rs and reel-to-reel tape because direct contact is common. Wash your hands before handling. CD-Rs obviously should be held by the edges only. Wearing lintless cotton gloves for editing reel-to-reel tapes, as some archival experts suggest, can be cumbersome, but it’s wise, at a minimum, to clean the machine and edit block before starting, and to keep hands free of grease and sweat. Certain types of markers, such as the Staedtler Lumocolor Non-Permanent AV (available at art supply stores), are preferable to grease pencils. And whether your tape is in a cassette or reel-to-reel, it’s critical to keep the entire tape path clean, reducing the possibility of build-up that can come off onto the tape.
For cleaning already “soiled” media, use a photographer’s compressed air blower to eliminate simple dust. If you are dealing with grease-from fingerprints, for instance-St-Laurent says the Canadian Conservation Institute recommends the use of “nonionic, ethylene oxide condensates surfactants” for cleaning. One such cleaner, Tergitol, is available from New York City’s Technical Library Service (212/465-8722). For CDs and CD-Rs, the Library of Congress recommends use of a very soft, clean lint-free cloth. The fog from your breath may be the only “cleaner” needed; otherwise use a commercially available CD cleaning solution, or a photographic lens cleaning solution and lens tissue. Wipe in a radial motion from the center to the edge (perpendicular to the tracks), rather than in a circular motion around the disc.
KEEP IT IN SHAPEFor most media, the keys to avoiding physical deformation are pretty simple. Store tapes (reel-to-reel and in-cassette) and discs vertically, rather than stacked horizontally or leaned diagonally, and don’t stack anything on top of the box or case.
For tapes, add to the above directives the absolute necessity of “packing off” before shipping or storing. Play the tape from beginning to end in one continuous pass, and store it “tails out.” It may be a hassle to remember (and a drag to tie up a machine), but poor tape pack is the leading cause of tape deformation. The damage can take the form of bending or folding of edges that stick up beyond the main pack, of “scalloped” or wavy edges, or of tapes that shift up and down as they move across the head (wreaking havoc on phase coherence). These problems are common in older reel-to-reel tapes. But just because you can’t see the tape pack as easily when the tape is enclosed in a cassette, there’s no reason to believe that the same problems won’t eventually affect poorly packed DATs, ADATs, etc.
Even tapes that are correctly packed when initially stored may lose their pack over time, particularly where temperature fluctuations cause expansion and contraction of base materials. The National Archives of Australia notes that “some tape manufacturers recommend the ‘exercising’ of tapes at least every three years to reduce the build up of stresses that cause problems such as ‘wrinkling’ or ‘cinching.’ Exercising, which involves winding the tape through its entire length at playback speed, may also reduce the danger of print-through. Tapes which are to be exercised in a different environment from that in which they are stored should first be allowed to acclimatize for 24 hours.”
One of the biggest concerns when dealing with reel-to-reel tapes that haven’t been played in some time is the condition of edits. In some cases, the editing tape adhesive dries out over time, and the edits simply fall apart as the tape is rewound or played, frequently where the tape is edited to paper leader. Worse yet is the problem of editing tape adhesive that has turned gooey. It can stick to the oxide of the adjacent layer of tape, in some cases pulling it off of the binder. It can also seep through the crack of the edit and stick the edited segment to the back of the next layer, creating a potential loss of oxide.
Remastering engineers and archival specialists who deal with older tapes all the time each develop their own techniques for cleaning up adhesive and reassembling deteriorated edits. But in terms of avoiding such problems down the road with tapes you are working on now, the best defense is clean, precise editing technique. That means no gaps or overlaps at the edit point, and no sloppy overhang of edit tape beyond the edge of the audio tape. Use high quality editing tape with a newer adhesive formulation. And make a backup copy (without physical edits) of the edited master.
One other physical hazard-tapes falling off their hubs-is found mostly with recordings made when it was common to store tapes on hubs alone rather than on complete reels. Tape purchased on hubs may be cheaper, and perhaps more compact to store, but it’s much more likely to end up in a tangled mess 30 years down the road.
If you are dealing with older tapes, particularly if the boxes seem fairly light, be careful to open the box with the tape horizontal. If the tape is stored hub-only, don’t immediately pick it up from the box. First check that the adhesive tape holding the end of the wind is intact. If not, and the wind is loose, tighten the wind by holding the exposed end of the tape with one hand and gently turning the hub with the other. Then re-tape the end. To take the tape out of the box, lay a flange (take apart a reel if necessary) on top of the tape and turn the whole box over with the tape supported by the flange the entire time. Then put the other flange on top and turn over again. After placing the tape (now between the two flanges) on the machine, remove the adhesive tape holding the end, rewind the tape all the way off the old hub, and replace the hub with a full reel.
If your tape is in a cassette rather than on a reel, remember that most of the stress on the tape comes during threading as it is loaded in and out of the machine. To keep your program material safe from this stress, never take out the tape unless it is wound all the way to the head or tail. And never start recording right at the head; one minute is a convenient amount of blank space to leave before the downbeat of the first selection. Also, if you have created a master by assembly editing (transferring song by song to a recording machine), it’s smart to immediately make a copy of the assembled master transferred in one complete, uninterrupted pass.
KEEP IT COOL AND DRYPerhaps the toughest challenge for long-term master preservation, even when your master has been prepared and handled with exemplary care throughout production, is maintaining appropriate conditions in the storage environment. The biggest concerns are temperature and humidity, clean air (covered above), and light. Depending on prevailing conditions in your region, your financial resources and the space you have available for storage, your best bet may be to leave your valuables in a professionally designed and maintained media storage facility. If that’s not an option, however, you can try to create your own storage environment.
Heat and humidity together present the biggest threat to material stored for the long term. The most widespread problem is hydrolysis, which is the absorption by the tape binder (it holds the oxide particles in the coating to the base film) of moisture in the air. This causes polyurethane in the binder to migrate to the surface, where it forms a sticky shed that scrapes off onto tape guides and can stop a tape in its tracks after just a few minutes of playing. Among professional tapes, Ampex stock manufactured from the mid-’70s to early ’80s seems most susceptible to this phenomenon. Luckily, most of these tapes can be “dried out” temporarily with a gentle dehydration process, and transferred to another medium. See “Sticky Shed Syndrome” in the May 1991 issue of Mix, or contact Quantegy (770/486-2803) for more information.
Everyone agrees that to combat problems like hydrolysis materials should be stored in a cool, dry place. But recommendations vary regarding the preferred parameters. At Hollywood Vaults (a storage facility profiled in Mix, January 1999), the air temperature is a constant 45degrees Fahrenheit and the relative humidity (RH) is maintained at 25%. St-Laurent suggests temperatures between 59degrees and 68degrees F, with a maximum fluctuation of 3.6degrees F, and RH of 25% to 45% (varying not more than 5%). The National Archives of Australia recommends temperatures between 64degrees and 68degrees F, with RH between 35% and 40% for magnetic media and between 45% and 50% for optical media. Maxell suggests that CD-Rs be stored between 59degrees and 77degrees F and between 0 and 40% RH.
Perhaps some of the variations result from differing expectations of the period the materials are to be stored. The Library of Congress defines two sets of conditions: medium-term storage (materials to be preserved for a minimum of 10 years) and long-term storage (materials having permanent value). Their recommendation for medium-term is 65degrees to 70degrees F and 45% to 50% RH. For long-term, the suggested temperature range is 46degrees to 50degrees F (colder temperatures may cause lubrication separation from tape binder). Suggested RH is 20% to 30% for magnetic tapes (open reel and cassette) and 45% to 50% RH for all other materials.
It’s hard know exactly how to interpret all these numbers, but it seems like a safe bet that a stable temperature within a few degrees of 55degrees F is a reasonable goal for long-term storage. As for RH, 35% falls in about the middle of the range.
Air conditioning alone won’t guarantee these conditions, and while constructing a special room may be an option for a label or a studio, it won’t be practical for many individuals. One possible alternative is to try to find self-contained devices that are designed for storing other products with specific temperature and humidity requirements (wine or cigars, for instance). But be aware that even if these devices provide the desired temperature and humidity range, they may have other characteristics, such as electromagnetic fields from compressor motors, that make them unsuitable for some types of recorded media.
Speaking of magnetic fields, it should go without saying that it’s a bad idea to store magnetic media near speakers. But be careful as well about operating machines with electric motors (including vacuum cleaners) close to magnetic tapes or disks.
As for light, the National Archives of Australia explains that “materials degrade more quickly when exposed to ultraviolet light. In storage areas, fluorescent tubes which are low in UV should be used wherever possible. Storage areas should not have windows, but if they do they should be covered with curtains or blinds. Lights should be turned off whenever possible.”
KEEP IT RUNNINGAll the right steps to protect your masters against the ravages of time will only take you so far toward the ultimate goal of being able to recover your program material from the storage medium. “Even if tapes or disks made today are in excellent condition in 30 years time,” the Australian National Archive notes, “the machines required to play them will almost certainly have been superseded long before.” Without a fully functional playback device, even the best preserved materials will be unusable.
Analog formats, such as 11/44-inch or 11/42-inch 2-track and 2-inch 24-track, have proven their appeal over time and will likely be available somewhere, somehow, well into the future. Digital formats have a less stable track record. The Sony F1 and the Mitsubishi X-80 are extinct, as are any number of magnetic disk formats. But some digital media, particularly DAT and CD-R, are currently so widespread that it seems likely that playback machines will be around for a good long while. Without getting into the pros and cons of any particular format for long-term storage, it only makes sense that as you commit to a particular storage medium, you also commit to having a machine around to play it. That means a machine that is regularly maintained in proper alignment, so that your media plays back without being damaged by the machine itself. For formats that seem to be fading from the scene, building up a hoard of extra players or spare parts might not be a bad idea, if you can afford it.
Of course, even having well-preserved media and a working machine will be of limited value if poor documentation makes it difficult or impossible to determine the contents of the master. Is it the original mix, or the EQ’ed version from mastering? Is it the radio edit, or the dub edit, or the version that was later re-mixed because the horns were too loud on the chorus? Was noise reduction used on the recording? And where are the tones? Don’t assume that anyone will remember anything about the material in a few years; write it all down on the box.
Lastly, it’s important to realize that there is no strategy that can guarantee that any given master will last forever. “The main prospect for long-term retention of the information held on magnetic media,” the Australian National Archive states, “seems to be in regular copying or data migration, thus maintaining a good quality signal which can be read using available equipment. Copying can either be to fresh tape or disk, or to some other machine-readable format such as CD-ROM.” If all the material you want to preserve is already released on replicated CD, you already have copies in what is (if stored properly) probably the most stable available format. Otherwise, plan on booking yourself a copying session sometime between now and 2009.


