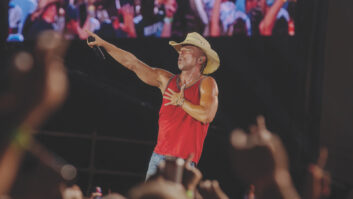
Reproducing the human voice in a concert situation can range from extremely easy (throw up the fader and go) to quite complex, depending on a number of situations surrounding the vocal. Are you mixing a soft-spoken singer, an aggressive rock group with multiple lead vocalists, or a pop artist whose crowd comprises 20,000 young teenage girls screaming at SPL levels higher than anything you’d ever want to compete with mixing-wise? In all of these environments, getting the vocal out there and on top is key to your mix.
THE VOCALIST
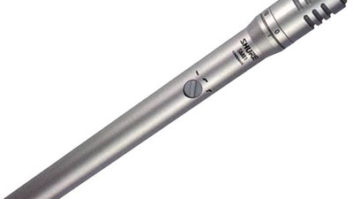
Choosing the right microphone is critical to your signal path. There are a number of quality mics from which to choose, with the defaults being either cardioid or hypercardioid, of the dynamic or condenser ilk. You’ll want to isolate the signal of the vocalist from any other background noise as much as possible so that you have a greater ability to control and shape the vocals as much as needed, without affecting the surrounding instrumentation.
Standard cardioid mics have a maximum cancellation of 180 degrees from the front of the mic’s diaphragm, which helps with bleed from stage monitors placed directly in front of the singer, as well as the crowd. Hypercardioid mics have a tighter polar pattern and focus on picking up what’s directly in front of it; as a result, their cancellation is around 135 degrees from the front of the mic, and a small lobe appears directly behind the mic, allowing for some ambient sound to arrive at the back of the mic. With a hypercardiod, make sure that you have a pair of monitors positioned to either side of the vocalist while leaving a small gap in between to help with feedback issues that can occur from having a speaker pointed directly at the rear lobe of the mic.
Handheld condensers can be wonderful-sounding due to their ability to capture much finer nuances and quick transients, but they can sometimes create an issue with extremely loud stage volumes. Cardioid vocal mics generally take a higher SPL level and can be a bit more isolated in noisier environments. However, many manufacturers have developed incredible-sounding handheld cardioid/hypercardioid condenser mics that not only sound great, but can take a beating, too!
WALK ON DOWN THE SIGNAL PATH
In addition to bleed between other onstage instruments, fighting feedback can be a challenge depending on your singer and his/her position onstage. During the 2008 Stone Temple Pilots reunion tour, lead singer Scott Weiland was very energetic—many times climbing up the P.A. or stage trussing, as well as standing in front of the main P.A. for entire songs. This made it extremely difficult to keep his vocal on top of the mix while battling feedback from the main system, and I took many different directions before finding a solution. Using a combination of channel EQ, dynamic EQ, graphic EQ and even a Sabine feedback suppressor, I was able to maintain a reasonably consistent vocal with minimal feedback.
Next up is the preamp. In most cases, you’ll work with the one onboard the desk. To keep your signal intact, make sure you’ve got a very healthy signal at your input without clipping the preamp. Too little gain will also get you into trouble because adding EQ and compression/limiting brings up the noise floor as each piece is inserted. Generally, before I EQ or insert anything, I’ll start by highpassing the vocal channel at 100 Hz (a good starting point) to eliminate unwanted stage rumble or bleed from low-frequency instruments, which just get in the way sonically. If your vocalist sings in a predominantly higher register, you can move your highpass upward from 100 Hz, possibly even to 250 Hz or above. Remember, what you’re trying to do is clear up what the mic is hearing so that you end up with a much clearer picture of the vocalist.

Eddie Mapp
HOMING IN ON EQ
When EQ’ing a vocalist, look into how the vocal is to be perceived in the mix. Does it stand out first and foremost over everything, or is it tucked away a little to give a better blend with the rest of the group? Live engineers usually rely on cutting offending feedback frequencies first and then focusing on what’s left. Many times scooping a little 400 to 800 Hz can make the vocal sound smoother and it won’t poke out as much by itself, but in the context of the band, it can easily get buried.
If your vocalist likes to “cup” the mic, the wonderful polar pattern that you selected is skewed as most of the phase ports near the diaphragm are covered up. One quick frequency to reach for is 1.6 kHz on your graphic EQ. This can tend to feed back pretty easily, depending on your mic. After this point we reach the 2 to 5kHz range, which is important for intelligibility but can also become very aggressive and fatiguing at high SPL levels. Pay attention to these frequencies so that the vocal cuts through the mix and doesn’t become too harsh. A similar situation occurs from 6 kHz on up, where you need these frequencies to be present but still kept under control. Because higher frequencies are more directional than lower ones, you’ll want to keep this in mind because some cardioid mics can become very omnidirectional around 8 or 10 kHz. (A little cut on your graphic EQ can help solve these issues.)
LET ME PRESENT DYNAMICS
If you’re mixing an aggressive hard-edged rock/metal group with screaming nonstop vocals, there may not be much dynamics to the vocals; it may simply be turn them up till they don’t feedback and just hold on to your fader! Other types of musical styles may have a very wide dynamic range that needs to be tailored to consistently sit in the mix without overcompressing within an inch of its life. There are dozens and dozens of analog compressors available, and even more plug-ins. Rather than go into specifics on each type of compressor on the market, let’s focus on what I consider to be an extremely overlooked type: multiband compression and dynamic EQ.
These two types of compressors split up your audio into several different bands, which allows you to compress each band independently. Multiband compressors are usually set up more like a crossover that you would use to separate different signals to different components in your P.A. While the signals are split up for independent dynamic control, all of the bands remain intact at the end of the compressor. With dynamic EQ, you have the same controls as you would a normal parametric EQ, but with the added features of being able to either compress or expand at the selected frequency. This type of control can be very confusing and even frustrating until you get the hang of it.
PUT IT ALL TOGETHER
I take a very hands-on approach to keep the vocal under control and intelligible. First, I get a starting point for how the vocal channel should sound after basic EQ’ing at a decent volume without feeding back, and then I listen to how it fits in contrast to the rest of the band. If it’s a reasonably dynamic band, you may want to leave a little extra room dynamically so that the vocal rides along with the other instruments and works together with the band. Setting a moderate compression level with a ratio of 4:1, attack at 40 ms, release at 300 ms with 4 to 6 dB of gain reduction should get you in the ballpark.
I save multiband/dynamic EQ for more aggressive rock-style vocalists, but the concept also applies to other genres. I use these types of compression to maintain my basic vocal sound, even when the singer is whispering or belting it out directly into the mic, with lips touching the windscreen. I tend to set my attack times very fast (3 to 5 ms), ratios pretty high (over 12:1) and release times starting around 300 ms in the low band and shorter times as the frequencies move up. Listen closely to each band because using too high of a ratio and too fast of a release time can cause distortion in the compressor. Essentially, I end up using each of these bands as a separate limiter for whatever specific frequencies I’ve chosen, and then follow this up with a separate compressor to smooth out the result.
FEMALE ROCK VOCALS
When mixing Evanescence Amy Lee’s vocals, it can be tricky to make sure that she stays on top of the mix while hard-hitting drums, bass, dueling guitars, keyboards, choir and strings are all flying around the room. There are times where everything drops out except her and the piano, and this must also cut through. Using a McDSP MC2000 multiband compressor in 4-band mode, I set the first band to compress the lower frequencies from 400 Hz and below so that during the softer moments, the lower register of her vocals doesn’t get lost. When she is singing in the upper registers, this band doesn’t compress until she drops down to softer and lower parts, at which point the compressor may be doing as much as 8 to 10 dB at the lower frequencies.
I don’t mess too much with the midrange band because it is essential for most vocalists. I concentrate more on 1 kHz to 4 or 5 kHz as it is the most sensitive range of human hearing and can get out of hand pretty quickly. Setting the compressor in this band so that it knocks back the loudest parts just a touch can make a dramatic difference. At 5 kHz and up, I generally use a de-esser with a very fast attack time around 1 ms or less, as well as a superfast release time of 10 ms or less, once again listening for any distortion artifacts.
MALE VOCALS
With Stone Temple Pilots’ Scott Weiland, I recently switched to a a Waves C6 compressor—you’ll probably want to break the manual out for this one. It has four bands of multiband compression, but also includes two additional bands that act as parametric filters, which can be very narrow or wide bandwidth. I use one of the bands set fairly narrow to help control the signature megaphone that Scott uses during several songs, which sticks out very strongly around 1.7 kHz. The other band is set around 4 kHz to help soften up this range, which can become a little fatiguing toward the end of the night.
BRINGING IN EFFECTS
I don’t use too much effects for processing and believe that they should be used sparingly and only when necessary. A little reverb can help the vocal sit in the mix a bit better at times, but it can also be distracting and cause problems in large rooms. I tend to find a nice-sounding plate reverb with a decay in the neighborhood of 1.2 seconds and the pre-delay set back just a few milliseconds to give the vocal a little more presence.
Pitch shifting can help give a sense of space to the vocal, as well as sometimes mask pitch issues to an extent. You want to apply this very sparingly and not overdo it—just a few cents down (-8) on the left and a few cents up (+8) on the right should work; also, adding a slight delay of 30 ms on one side and 50 ms on the other can help spread this effect out to give you a larger vocal.
RIDE THE FADER
As a mixing engineer, it is your job to be attentive and deliver the best and most consistent show night after night, and this means paying close attention to the artist. Your knowledge of the artist and your ability to make split-second decisions cannot be replicated.
Front-of-house engineer Eddie Mapp has mixed for Evanescence, Stone Temple Pilots and Taking Back Sunday.