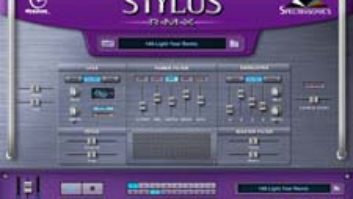
The Assign Menu lets users harness the features of Edit Groups.
The Stylus RMX real-time groove module combines maximum flexibility with an emphasis on sound quality when working with looped-based audio. Note, I didn’t say drums because you can import anything into RMX and go crazy.
DRUMS ARE JUST THE BEGINNING
Anything in REX file format can be converted into RMX’s SAGE format using the included SAGE Converter application. Not only will these imported elements automatically sync to your current tempo, but because you’re dealing with fairly short slices of audio, pitch shifting is very effective and RMX does it all in real time.
IMPORTING SINGLE HITS
Take the individual hits you want to import and lay them on a single audio track in any audio editing program. Bounce the entire string of hits into one long audio cue. Then, using ReCycle, place a slice in front of each hit in this long file and save it as a REX file. Use the SAGE Converter to import the REX file.
Once in RMX, when you select this imported element, make sure you’re in Slice Menu MIDI mode and then each hit will reside on its own key. This is a great way to archive cool sounds from one project for quick use in later sessions. And with all of RMX’s sound-shaping possibilities, you can make the sounds be unique very quickly each time you use them.
EDIT GROUPS ARE YOUR FRIENDS
One of the most important, yet least-understood, aspects of Stylus RMX is that Edit Groups work within the context of Suites, not Elements. Edit Groups do not get lost or reset when switching from Element to Element within a Suite. This becomes extremely powerful when you build your own Favorites Suites.
Start by finding 10 grooves that you think will play well together. Add them to the Current Favorites Suite using the Browser Page’s Add button. Now, with 10 grooves in one Suite, use Edit Groups to custom-tweak several grooves within this Suite all on the same Part. Start in Slice Menu mode and choose the top groove in the list. On the Edit page in the Edit Group Assign menu, choose “Assign (1 and 3) Downbeats.” Do something obvious, like pitch shifting the Downbeats up +24 using the Coarse Pitch slider.
Now, go back to the Browser page and choose the second groove in the list. Return to the Edit page, and in the Assign menu, choose “Assign (2 and 4) Backbeats.” Pitch-shift these backbeats down -24. Notice that both Edit Groups are in the Edit Group list. Now switch to Groove Menu mode; each complete groove will reside on its own key.
You can play all of the grooves together on the keyboard at once with all the tweaks still intact. Remember, you still have seven free parts in which to load more content. In Slice Menu mode, you can even add slices of several different groove elements to the same Edit Group using the Add/Remove Slice feature.
SIMPLIFY A BUSY GROOVE
In the Edit Group Assign menu on the Edit page, choose “Assign ⅛-Eighths.” Switch back to the Main Edit Group and mute it. If the groove sounds a little staccato or choppy, then move the H, D and R sliders up to increase the slices’ length in the AMP Envelope section and the choppiness should disappear. However, if you increase the H, D and R times too much, the polyphony is exhausted, as each slice has such a long duration and slices can get missed.
SHORT TICKING PERCUSSION
Sometimes, some choppy, short, ticking percussion can make a groove move along nicely. This is easy to do. On the Edit page in the AMP Envelope section, drag the H, D and R sliders lower to shorten the slices’ duration. This results in a wonderful staccato percussion that can be a great background track to another more prominent drum line. Or, you can take this idea one step further with Edit Groups: Leave the downbeats and backbeats at full duration so that they maintain their original sound, but shorten all the surrounding slices.
Try this: Begin with “90-LillGirl Combo” from the Core Library. In the Assign menu on the Edit page, choose “Assign ¼-Quarters.” Switch back to the Main Edit Group. Once on Main, move the H, D and R sliders to the following values: H, 0.003; D, 0.009; and R, 0.004. Originally, the hi-hats and other offbeat slices of “90-LillGirl Combo” were very prominent; now, they are much more subtle.
FATTER DRUM KIT SOUNDS
Create really fat sounds in Kit mode by layering elements of the same kind across the parts. For instance, you could load all eight parts with different snare kit modules. All eight parts would trigger from the same two keys for a huge, layered sound. Each snare sound can still be tweaked separately from the others, as they all reside in their own parts. For this to work, ensure that the MIDI mode is set to “Kit CH 1.” This makes all parts respond to incoming MIDI channel 1.
Composer/engineer Gabe Shadid co-owns L.A.-based trailer music company Epic Score with Tobias Marberger. Visit him at
www.epicscore.com.


