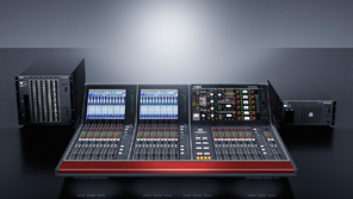
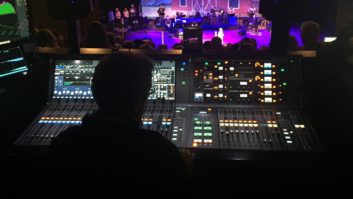
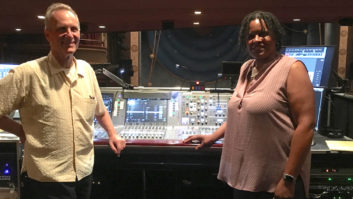
With more than 1,000 units sold, thousands of engineers have used the Yamaha PM5D. This year’s TEC Award — winning digital live console — a cross between an SPX and a PM5000 — has a relatively smooth learning curve, but here are a few tips to get you started.
YSM Editor screen provides access to all console parameters.
ADVANCE WORK
With any digital console, advance preparation eases the way. Yamaha’s free Studio Manager (YSM) software includes a PM5D Editor to configure the entire board for doing your pre-soundcheck setups on a laptop while on the bus, plane or at home. When saving your work as a *.PM5 file, use meaningful labels that include both the project’s name and a version, such as a date or time, like “WINWOOD071105” or “ALGREEN420PM.”
I wrote a few basic YSM keyboard shortcuts on board tape and put them on my laptop to memorize them: Ctrl+2 = open input channels 1 to 24; Ctrl+Alt+2 = open input channels 25 to 48; Ctrl+3 = open selected channel control strip; Ctrl+0 = open the graphic EQ; Ctrl+8 = open the effects editor; Ctrl+W = close selected window; and Ctrl+Alt+W = close all open windows.
HOOK ‘EM UP!
The software lets you expand the PM5D’s 10-inch LCD with a second monitor, making it more convenient for two people to work on the desk at a time. Connecting via a Type-2 USB cable, Studio Manager can synchronize with the console, letting the system engineer assist while the artist’s engineer tweaks the mix. Load a PM5D profile into YSM in Setup under the File menu. Under the MIDI Ports tab on that menu, set the USB I/O ports. For a single console, choose Port 1 for each. Next, select USB I/O ports again in System Setup under the File menu. Connecting requires you to install the PM5D driver (included with the YSM software) from the YSM’s Driver folder and reboot. It’s not unusual for the driver to need to be reloaded more than once.
SAVE, SAVE, SAVE
You’ll learn to save at regular intervals so you can go back to a previous state in case of a catastrophe. Typical operator error is loading when you want to save, replacing your current work with an older file. Some users turn on the incremental save, which creates a series of “historical” saves in subsequent memory locations.
Depending on the size of libraries and scenes, each console setting requires from 200 KB to 2 MB. These can be stored to Compact Flash (even the 32MB Compact Flash cards that came with older cameras can hold dozens of setups) or your laptop. E-mail files to yourself for cheap “offsite” storage.
MONITOR PLANS
Sticking with the familiar system of numbering monitor mixes — going from stage right to left and from downstage to up — will keep you from having to repatch when you get on someone else’s system for a festival or support act. Organizing the way wedges, in-ears and effects send is a matter of convention. The PM5D has 12 graphic EQs, so assign them to the first dozen auxes for use as wedge mixes.
Using the first four of the eight internal effects with the last four auxes also makes sense. These first four effects are normally returned to the four stereo effects returns, leaving auxes 13 to 20 for use as four stereo-linked in-ear mixes. The four stereo effects returns don’t have gates or compressors, but the four stereo line returns do, and those on the PM5D-RH versions have mic preamps and could be used for ambience mics.
GOES-INTAS
The control surface has two 24-channel “pages,” so manage any input lists longer than 24 so that the split isn’t awkward. Try putting the backline on the first page and the vocals, star performers and money channels on the second page. And leave some list space for adding new channels. Moving everything down to make room for another input is annoying and channel names don’t copy with the channel information.
When mixing to stereo auxes, the Pan control on the channel affects only the main L/R mix. To adjust pan in a stereo aux, such as for in-ear mixes, use the first rotary encoder “knob” of the paired mix in the mix section’s bank of 24. The left is pan and the right is level. When in Mix Master mode, holding the input channel’s Select will temporarily take you to Mix Send mode until you release it. To put a stereo input in a stereo mix, assign and pan both channels. Note: An odd-numbered mix must pair with the next-higher even mix to make a stereo bus.
FINAL TOUCHES
Selecting DCA in the Assign Mode section lets you create DCA groups by pushing the Cue button below the DCA fader and then hitting the Cue button of every channel desired in that DCA group. Similarly, mutes are assigned by using the Scene Memory keys left of the display screen. Beside the eight Mute Group buttons are eight DCA Mute buttons.
Placing each aux bus on a row of faders makes it easier to manage a large number of monitor mixes. However, unlike an analog knob matrix, you can no longer give more hi-hat to the guitarist with one hand while giving more kick to the bass player with the other. Holding your second hand up like a traffic cop to deal with one musician at a time will become second nature.
When first using the PM5D, give yourself some time to practice the moves of tweaking and copying channels and mixes. In an hour, you’ll find yourself getting around this board as you would on an analog desk.
Mix sound reinforcement editor Mark Frink thanks Burbank ATK/AudioTek engineer Tom Pesa for his assistance with this article.


