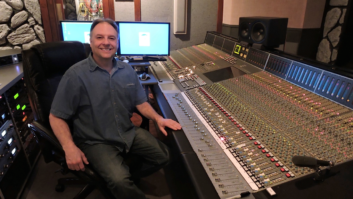
Sound designer Glen Yard: “When I call myself a sound designer, it’s because I was the project’s entire sound department from beginning to end—from location recordist to re-recording mixer.”
Freak Out is a comedy/horror film best described as the bastard offspring of Weird Science and any of the Friday the 13th films. It’s the story of two losers and their pet project: training an escaped mental patient to be a serial killer using everything they’ve learned from watching an endless stream of crappy horror films. Naturally, things don’t go quite as planned, to say the least. The film may not be one of the larger independent breakthrough hits that are annually spawned by Sundance, et. al., but it is a true low-budget triumph that is slowly carving out a cult audience, which is sure to increase now that the film has been released on DVD in the U.S. following a successful UK release.
Freak Out was made with small change — around $50,000 — by a tiny group of committed, first-time filmmakers on the sleepy south coast of England: Christian James (director/camera/editor), Dan Palmer (writer/producer/actor), Ian Chaplain (line producer), James Heathcote (lead actor) and myself, Glen Yard (sound designer). It was shot on 16mm and took three years to complete (2000 to 2003) and another couple of years to find distribution. Everything about Freak Out‘s production was small-time, but it developed into something big-time, having wowed audiences at global festivals. It was also snapped up by one of the world’s leading horror film distributors, Anchor Bay.
When I call myself a sound designer, it’s because I was the project’s entire sound department from beginning to end — from location recordist to re-recording mixer. Previously, I hadn’t worked on any finished film that was longer than 15 minutes, and this was to be more than 90 minutes.
Freak Out was filmed sporadically whenever cash was available to fund it. There was no set-in-stone schedule because it was pointless putting that pressure on ourselves if we didn’t have the moolah. We’d raise some money, then film, raise a bit more money, then film a bit more. All involved were juggling various jobs and courses throughout — personally, I was stacking shelves at night, and during the day I studied for a degree in film and animation at a local art college. At times it seemed unlikely that we’d ever finish the film, let alone that it would be of any worth. However, as time went on and we started to piece scenes together, we knew that the results were good and getting better, and thus silencing all the doubters we would bump into who couldn’t believe we were still working on that film.

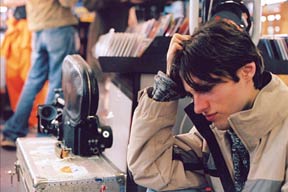
Behind the scenes of Freak Out during a rare non-bloody moment
As film was so expensive, we quickly learned how to shoot on the fly, forgoing any form of slate markings. Because I was the entire sound department and James handled camera, direction and editing, we could easily reference anything between us as we knew the film inside out. Later, as the edit began, the audio was synched up by clap alone as we were also working without timecode: No edit decision lists for us! That bit us on the backside a little for the visual side when at the end of all this, the film was given a high-definition transfer and had to be re-edited cut for cut. (The film was originally edited off of miniDV copies of the original Beta tapes. There has never been an actual print of Freak Out, even though we went to all the trouble and expense to shoot on film.)
To be fair, I wasn’t strictly the original sound man — a couple of college slackers shared duties before I came onboard (entirely at my insistence of there being some quality control). The first one had a habit of disappearing when needed, meaning sound would be recorded by a chair or random passer-by. The second one added a lovely “warmth” to all his audio in the form of a loud, bass-heavy, hissy hum. The same person was also responsible for a good six months of audio, and most of the location recording kit was stolen from his unlocked car in a bad part of town. It all got a bit messy for a while, but lesson learned — you may lose friends while making an independent horror comedy!
The location sound rig I used was a Sennheiser MKH416T shotgun microphone, Samson Mixpad 4 portable compact mixer and a Sony MZ-R37 MiniDisc recorder. We recorded on that format because that’s all we could get our hands on for any length of time and because it was nice and user-friendly. I knew the scary stuff about MiniDisc’s limiting and compression, but it served me well with good results. I continued to use the same recorder into post-production for continuity.
The Sennheiser was acquired from my college at the time in a state of disrepair, and I was told that if we could get it reconditioned, we could use it for as long as we wanted. I ended up getting so attached to it, I kept it! The 416 was the only microphone we had and we recorded everything with it. With a lack of a proper fish pole, I went through a series of substitutes, including a telescopic golf-ball grabber, a giant screw (because it fit the microphone mount we had left after the theft) that would cut into your hands if you held it for longer than a second and the one that I settled for: a broom handle. During shooting, I decorated it with actors’ signatures and motivational buzz words such as “success,” “destiny,” “Hollywood” and “Give it up and become an accountant!”
The rig was rag-tag but was comparable to our lighting and camera equipment. The camera we used, an ancient Arriflex BL, was noisy at times but the old trick of covering the cameraman in duffel coats did the trick. All the money we had — and I mean all of it — went to buying and processing film stock. Everything else and everyone’s niches were self-funded. I still have a shoe box bulging with receipts.
Over the course of shooting the film, I was presented with a number of recording environments, including a shopping mall, an abandoned art college, a bowling alley, an elementary school, a theater, a supermarket and a busy street in central London. And although most locations were suburban and uncrowded, it still proved to be tricky to work unobtrusively and to limit interruptions from the general public or business employees. I was always sure to cover myself with wild line recordings directly after shooting to keep any spontaneity intact just in case the dialog had problems or the actors were difficult to get hold of again. I also tried to record most rehearsals, even if just for scraps of Foley. And if there was any down time between setups or waiting for sunshine, I’d take the participating actors to a quiet spot and run through what had just been shot, including separate runs of dialog and movement. Generally, I was my own boom operator, which allowed me to grab bits of Foley and sound effects quickly and efficiently without having to confer with anyone and wade through cables. A few times, I managed to record, operate the boom and appear in a shot as an extra — very handy for getting into a better miking position.
For the first time as a sound designer, I got to deal with standard action-movie intrusions, such as smoke and wind machines, live firearms, squibs and a rather large explosion — things I had never experienced through years of tedious, pompous college productions. We were making a fun film that was fun to film — add to this the various gore gags, decapitations, chainsawing of guts and myself in a grandstanding cameo being sliced in half by a giant supernatural spatula.
Time wore on and eventually all our situations changed. After a couple of years, I was no longer a college student supplementing my education with another project; I was a college graduate working dead-end jobs for very little and working on Freak Out for nothing. Looking back, everyone’s commitment to such a long-term project was impressive, but at the time it wasn’t even questioned.
Editing began slowly during mid-2002 as final components were shot for some scenes. I wasn’t 100-percent sure if I would be needed to help finish the film. I had an opportunity to move away to London to do what everyone else did when they graduated — be a go-fer in television — and at the time I didn’t have any form of sound editing equipment readily available. Still, I decided that doing the stuff that I would be doing with Freak Out‘s post-production was what I eventually wanted to do anyway, so why not do it now instead of later and learn as I go.

I had previously worked with Pro Tools at college and knew my way around it, so it seemed the logical step to work with it again so I could hit the ground running. I managed to get myself Pro Tools LE 5.3.1 and the Digi 001 hardware to run on a PC that I bought off of eBay for around $500, and by Christmas 2002 I had edited my first scene. Working with Pro Tools, I used only the basic Audio Suite tools, and I was limited to working on a single computer screen, so the edit window and the QuickTime movie had to share space.
Soon after I started, I tested my mixes through a couple of different speakers via DVD. I know the general consensus is that films these days are way too loud and would have greater impact if they were more dynamic, but even so, I tried to match the roaring Hollywood spectaculars buckling under the weight of their own noisiness. I didn’t want to let the film down in the ears of a general public that wants big, in-your-face movie sound. I found that upping the ante sonically all around helped the film’s raucous nature, and helps set it apart from other independent films that have perfectly serviceable sound, but seem unwilling to blow peoples’ heads off due to their own constraints. To be honest, at times I completely ignored level meters as long as it sounded good, only backing down if any clipping or distortion was present. At a number of punchy moments I even used distortion to my advantage. This method satisfied me in the short term, as everything sounded lovely and meaty, but in the long term, I worried about a professional’s eye seeing what I had done.
The music for the film, by up-and-coming composer Stuart Fox, was completed late in the editing process, so prior to this and working without any idea of how the music would play, I tried to give as full an audio picture as possible throughout. My workload was also affected by the fact that around 30 percent of the film had no original sound at all, thanks to sound man number 2. With these scenes, total reconstruction was needed and my Foley work was intensive. Looping these “mute” scenes required eye-fatiguing, lip-reading and some arduous re-recording sessions, as any potential diversions from the script and vocal ticks had been lost forever. During these sessions, once-regular dialog became snatches of sentences endlessly repeated to almost hallucinogenic heights, as we sat rewinding and fast-forwarding raw footage on a 14-inch combination television and video unit that nattily sported a foam helmet that I had made for it to stop any unwanted noise.
As I self-produced almost all of the Foley, sound effects and atmospheric effects, I was wary of using any library stuff, thinking it just didn’t sound that good; plus, the selection I had on hand was limited. But thanks to Freak Out, I now have the beginnings of an extensive personal effects library. Doing this myself meant many late nights stomping around my parents’ house while they were asleep and rolling about in the driveway for fight scenes. Living near an airport meant doing this during the day was impractical. I made great effort for any sound effects, Foley and especially dialog to be recorded in a similar environment to where it was originally shot. This helped the film sound more “live” and have more depth than many low-budget productions, where the dialog can sound very upfront and bland if hastily pumped out in a recording booth.
The action, horror and fantasy aspects of Freak Out provided some great opportunities to throw crap at walls and hit things with machetes and frying pans. A few sound effects tips: Try crunching mints in your mouth for cracking bones and really starchy pasta for great squelch and slime. For gore and crunches, I manually scrolled through selected pieces of audio — e.g., a coconut smash — at varying speeds and then recording them back in, slowly warping the beginning and then speeding up, and at the last moment adding some dramatic attack into what started out as a pretty standard piece of sound effects.
The original mix of the film was done only in stereo. I was very aware of many scenes’ potential for surround, but I was too occupied with working through everything else before I attempted any true surround sound, as this was something I had never done before and my basic Pro Tools package had no surround tools. I was working on producing a home surround mix just before Freak Out was snapped up by Anchor Bay.
The work continued after the first screening and alongside subsequent showings. The film was re-cut and tweaked, requiring audio to be smoothed out. I attended as many screenings as possible, through numerous London industry showings and on a tour of universities all around England. These screenings provided me with as many questions as answers as to what I was doing right and wrong. Any adjustments I made were generally punching up the big moments, hits and screams, sucking bass out of some vehicle atmos and making moments of dialog clearer.

Glen Yard gets bloodied up for his cameo performance—being sliced in half by a giant supernatural spatula
The ranging quality of exhibition environments was always interesting. The screenings in London left me feeling totally satisfied: At one point, we shook the room with a door slam — mission accomplished; I blew peoples’ heads off! But the variable conditions of the university tour occasionally made me feel ill, exposing the fact that maybe I’d gone too far for less-powerful sound systems. We had a couple of screenings in science laboratories, one where the speakers where hidden in the ceiling covered by roof tiles and another where when we first arrived, the sound was set to come out of a projector’s onboard speaker. Not ideal, to say the least.
As the university tour ended, we launched ourselves onto the festival circuit by way of a lot of heat we were getting from various print and Web reviews. Festival success came from the Rhode Island Horror Film Festival, where we won Best Genre Crossover; the Montreal Ubisoft Fantasia Festival; the German Weekend of Fear; the Festival of Fantastic Films in Manchester, England; and the Fearless Tales festival in San Francisco. From there we began our courtship with Anchor Bay.

From left: Dan Palmer (writer/actor/producer), Yazz Fetto (actor, co-producer) and James Heathcote (actor)
During this period, I began to archive my work, because in the initial edit I didn’t split my mixes into specific stems because I was working as quickly as possible. I had plenty of backup and kept the numerous single audio tracks in original edit form; i.e., in a big mess. Previously, I generally passed a single final mix track to James to be synched back up to the visual edit. But for my own peace of mind and to make any future re-editing much easier, I began to work my way — scene by scene — back through the film, splitting up the original edits under the appropriate labels and adding or fiddling with anything that had continued to irk me through repeated viewings.
Once Anchor Bay got hold of the film, they employed a freelance sound mixer, Mark Whiley, to do a 5.1 surround mix. Alas, I wasn’t invited to participate in that, but I made damn sure that everything would be fine by writing a thorough description of each scene and its surround potential, alongside time increments for reference. At the outset, Mark only asked for the minimum number of stems to work with — dialog, music and sound effects — but later added atmos, Foley and some extra surround-ready tracks to give him more flexibility. Mark did the surround mix using Apple’s Logic program, and because the film was already mixed, his work for the surround mix was mainly keeping things as natural as possible regarding channel placement. The final mix was in Dolby Digital (AC-3).
Freak Out was a huge learning experience for me, and whereas I still felt unsure of myself when I left college, I now feel able to jump straight into new projects. Working on the film has given me confidence, craft, friends, an excellent business card (I can slap a swanky double-disc, surround-sound, special-edition loaded with extras on any potential employer’s desk) and even some local celebrity status!
Through working on this project, too, I think I have happened upon the long-standing secret of doing high-quality sound on a low budget: There isn’t one! Sadly, it seems it all comes down to hard work and creativity, even more so at this lowly level. I found that there was quality and consistency to my work because of what I had already personally invested in the project, so maybe the “secret” should be a passion to do the job and to do it well, regardless of time, energy and circumstance.
For more info on the film, go to
www.freakoutmovie.com. Glen Yard has recently completed work on the British horror film The Witches Hammer. He can be contacted via
[email protected].
