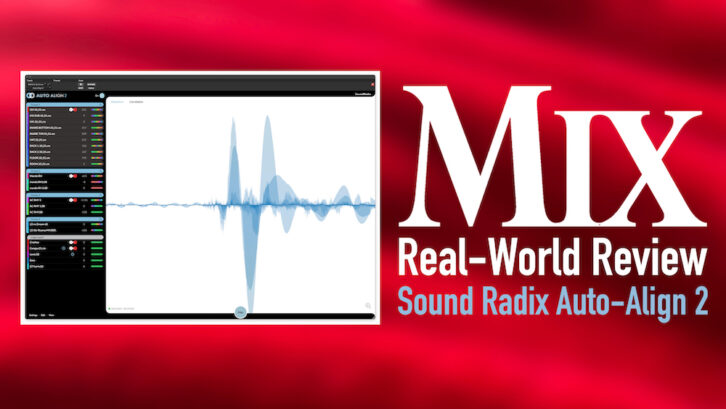
| MIX VERDICT: SOUND RADIX AUTO-ALIGN 2 |
| THE TAKEAWAY: “Between the timing offsets, spectral phase optimization and polarity adjustments, Auto-Align 2 can add punch and clarity to your mix.” |
| COMPANY: Sound Radix • www.soundradix.com PRICE: $199 first-time purchase, $99 upgrade PROS: • Significantly faster workflow. • Upgraded algorithms automatically adjust timing, phase and polarity. • Creates automatic alignment groups. • Finds optimal reference tracks within groups. • ARA2 support in multiple DAWs. • Freely resizable GUI. • Choice of four formats for viewing timing offsets. CONS: • Somewhat less user control than in the previous version. • Implementation of ARA2 in Logic Pro X creates long character strings in the track list. • No renaming function for Groups. |
Software updates come in many forms. Some are minor maintenance releases, others offer a few or many new features, and once in a while, you get an update that fundamentally changes the workflow of a product. Auto-Align 2 (Mac/Win) falls into that last category.
The plug-in is significantly more automatic than its predecessor, which had a more “hands-on” approach. Users had to assign a Send or Receive channel for each plug-in instance. The plug-in would then align the Receive channels to the Send channels. You also had adjustable input and sidechain parameters, whose settings could affect the outcome of the processing, and you could choose to detect delay, phase alignment or both.
By comparison, Auto-Align 2 takes care of all that and more with a single button push. If you’re unhappy with the results, you can manually adjust some of the parameters.
WHAT IS IT GOOD FOR?
The primary function of audio-alignment software is to correct the phase issues that occur when multiple mics are used together in the same space. Because the mics are different distances from the source (or sources) being recorded, the sound waves arrive and get recorded—both directly into mics and through bleed—at slightly different times. That can lead to phase problems.
For example, if you’re recording a drum kit with multiple mics, the snare drum will bleed into other spot mics, such as those on the kick and toms. The snare will get recorded not only onto the track (or tracks) for its dedicated mic (or mics), but will also bleed into the kick and tom mics, arriving at slightly different times on each track.
When you sum those tracks in the mix, the late-arriving waveforms can cause comb filtering and other phase issues. Auto-Align 2’s algorithm looks at the transients, spectral content and other factors of the various tracks and adjusts their timing to create the optimal phase coherence. The result: punchier transients and improved fidelity.
The plug-in also looks for and corrects tracks that are out of polarity with each other. This automatic polarity matching saves you from the tedious process of auditioning various track pairs and checking whether they sound better together with the polarity reversed.
Sometimes, only certain frequencies on a track are out of phase. In those situations, Auto-Align 2’s Spectral Phase Optimization processing kicks in, using frequency-targeted phase shifts to correct such issues.
READY, SET, ALIGN
Sound Radix recommends instantiating the plug-in on all audio tracks as early in the mixing process as possible before you get into significant editing. The company says that the more data available for the plug-in to analyze, the better the results.
That one button push I referred to earlier is the Align button. You put your DAW transport into Play, press Align, and Auto-Align 2 begins analyzing your tracks. If you stop the playback before 30 seconds, a dialog box tells you that the plug-in needs more data to work correctly. The manual recommends letting the song run from beginning to end.
If you have an ARA2-compatible host that supports Auto-Align 2—currently Reaper, Cubase/Nuendo or Studio One—you don’t need to play back the part; it’s captured automatically. Logic Pro X also offers ARA2 support for the plug-in, but you must hit Play for a second to transfer the data into the plug-in.
I noticed when using Auto-Align 2 under ARA2 in Logic that long, character-based identifiers appeared next to each track name in the plug-in’s tracklist, making the names harder to read. In Studio One, however, the names of the tracks appeared as normal, without the extraneous characters.
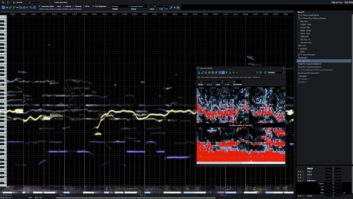
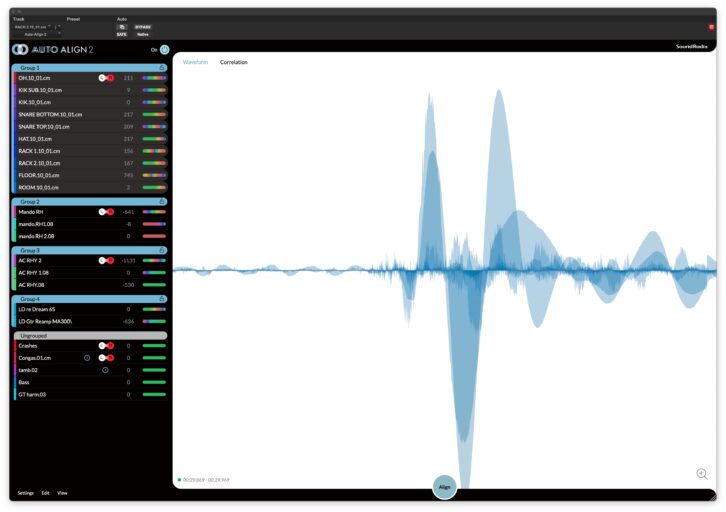
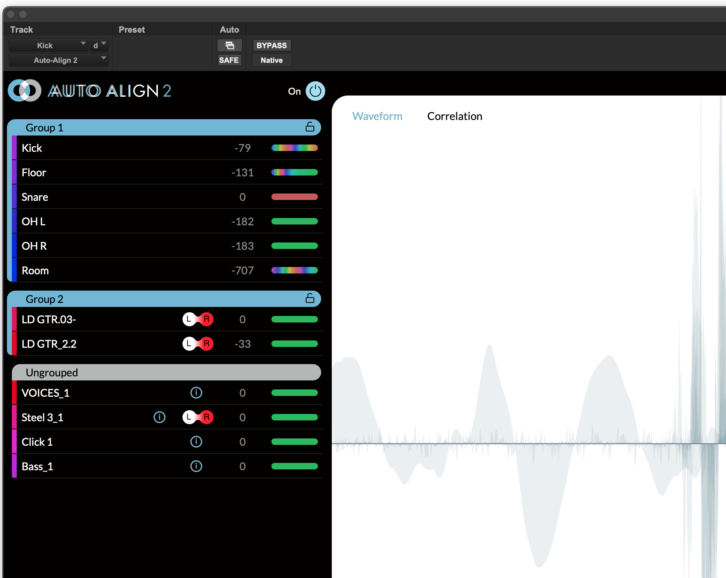
Whether you open Auto-Align 2 under ARA2 or as a standard plug-in, all instances of the plug-in are linked, and each shows the status of all tracks in the session with the plug-in instantiated on it. In that display, you’ll see waveforms on the right and a tracklist on the left. If you have too many tracks to show simultaneously in the GUI window, you can freely resize. It.
Once Auto-Align has captured the audio, the alignment process only takes a few seconds. The more tracks in your session, the longer it takes. After it finishes, you’ll notice that Auto-Align 2 has grouped your plug-ins. Grouping is critical because the plug-in only aligns tracks within groups.
Any tracks with common acoustic information, such as those recorded in the same room, get grouped. Otherwise, the plug-in looks for additional similarities to use in its grouping decisions. If it can’t find any, it leaves those tracks ungrouped, which means they won’t get aligned.
If unsatisfied with the automatic grouping, you can create your own groups and move any track to any group. You create Groups in the Settings menu at the lower left. They’re named Group 1, Group 2, etc. When I first tried this feature, I assumed I’d be able to rename the groups, but there’s no way to do it. It’s not a huge issue, but it would be a handy option. Maybe Sound Radix can add Group naming in a future update.
Within each group, the algorithm typically anoints the earliest arriving track as the “Key Time Track.” You can change which track gets that designation after the initial alignment.
My assumption was that the Key Time Track is the alignment master reference within a group. But a careful reading of the manual showed that wasn’t entirely correct. “The tracks in a Group aren’t merely aligned to the Key Time Track,” states the manual. “Instead, each track is aligned to every other track within the Group and the totality of that alignment is aligned to the Key Time Track.”
Engineers who use alignment software often have their own system for which drum tracks will be the alignment reference and which will be aligned by them. For example, the snare bottom and hi-hat to the snare top, the overheads to the kick, etc. Because the timing of the Key Time Track isn’t the only factor in the automatic alignment decisions in Auto-Align 2, and you can’t adjust the others, it seems as if you don’t have quite as much manual control over the results as you did in the previous version.
ON DISPLAY
Next to each grouped track is a text field that shows how much it was offset in the time-alignment process. You can choose to view the data in samples, milliseconds, centimeters or inches. Positive values indicate that the track was moved forward. Negative values indicate that it was moved backward.
The distance measurements of the offsets indicate how far the sound would have to travel to align with the Key Time Track and equates with the distance between the spot mic on the source and the other mics where the source gets recorded as bleed.
The Key Time Track will show a zero. If you designate a different Key Time Track, the plug-in will immediately change the alignment of all the tracks in that group. So it’s easy to experiment with different Key Time Tracks.
To the right of the timing data is a color-coded Phase Meter that lets you know at a glance which type of phase processing, if any, was required to align that track.
Neural DSP Mesa Boogie Mark IIC+ Suite — A Mix Real-World Review
Solid green indicates that no polarity or phase adjustments were necessary. Solid red tells you that a 180-degree polarity reversal was implemented. A multi-colored display shows that Auto-Align 2 applied its Spectral Phase Optimization.
The Visualizer is the large, monochrome display on the right side of the GUI. One use is to confirm that the plug-in is capturing audio after you press Align and hit Play on your transport.
After you’ve aligned the tracks, it shows the overlaid waveforms of the currently selected Track Group. At that point, you can see how much the program offsets a particular track by stopping your DAW’s transport and then turning off the Power Button (the master bypass for the plug-in). When you do, you see the offset track return to its original position. You’ll see it flip over if it’s had its polarity reversed.
You can also switch the Visualizer into Spectral Phase Optimization mode, which uses bar-graph style lines and functions like a stereo correlation meter. Selecting a track shows the frequencies in it that are canceling, adding or not impacted vis a vis the other tracks in the Group.
TRIALS
Over several weeks, I used Auto-Align 2 on several mixes and was impressed with its simplified workflow and the power of its new algorithms. Between the timing offsets, spectral phase optimization and polarity adjustments, Auto-Align 2 can add punch and clarity to your mix.
As expected, it had its most significant impact on multitrack drum recordings and other multi-mic recordings. But it’s easy enough to try it on other tracks that need relative tightening.
If you’re a user of the original Auto-Align, and have an established method for configuring alignments—particularly of drum kit tracks—you may find that the new workflow slows you down a little. That’s because you’ll have to first run the automatic alignment and then reconfigure the Groups to match your system. But I suspect that almost everyone else will greatly appreciate the speed and power of the new version.