On the surface, audio production in Mac OS X isn’t all that different from working in OS 9 once you’ve set up your DAW to interface with its new environment. But dig a little deeper and you’ll find some cool features offered in OS X. Some of the following features may not have been implemented in early OS X versions, but they are all included as of OS 10.3.8 (Panther) and should also work with Tiger (OS 10.4).
WHAT’S UP, DOCK?
The Dock is more than a convenient launchpad for applications — it can also help keep tabs on CPU or memory usage, among other things. To set this up, drag the icon for the Activity Monitor utility (located in Applications/Utilities) to the Dock. Launch the Activity Monitor (either via the Finder or the Dock) and press its Dock icon with your mouse. Drag your mouse to Dock Icon in the pop-up menu that appears and choose the desired command (Show CPU Usage, Show Memory Usage or other) from the ensuing list of options. The Activity Monitor’s Dock icon now graphically and dynamically displays the chosen parameter’s state. The Dock’s display is pretty tiny compared to the utility’s full-size view, yet it’s always conveniently visible — as long as the Dock is visible and the Activity Monitor is booted — while working in your DAW.
Despite the useful feedback such real-time performance monitors provide, problems will inevitably crop up. When your DAW freezes, the “spinning colored beach ball” may prevent you from quitting via the Apple menu’s Force Quit command. A quick way to thaw your DAW is to click on the application’s icon in the Dock while holding the Option key on your QWERTY keyboard. Then select Force Quit from the pop-up menu that appears above the icon.
LET’S GET LOADED
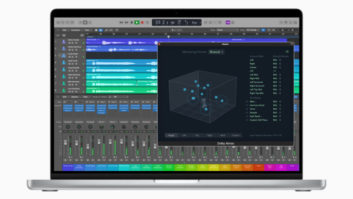
When your host app attempts to load newly installed AudioUnits plug-ins for the first time, the plugs will automatically be examined to determine if they meet Apple’s AudioUnits standards. Your DAW should automatically save a self-generating report that details which plug-ins failed the exam and weren’t loaded. For example, Digital Performer users can open the “MOTU Test Results .txt” file located in their home folder’s Documents folder. This file keeps a running record of all AudioUnits exam results, with the oldest results first. Similarly, Logic users can run the Logic AudioUnits Manager utility, launched via the DAW’s Logic Pro>Preferences hierarchical submenu to peruse exam results. Once you’ve determined which plug-in(s) failed the test, follow up with the manufacturer to see if there is a fix (i.e., patch or update).
The exam may get hung up on a plug-in — neither passing nor failing it — if it hasn’t been authorized. If you skip the exam, the plug probably won’t automatically load after it’s authorized. In Logic, you can force the plug-in to load using the Logic AU Manager utility. In Digital Performer, you must force a re-examination of the plug-in by trashing the AudioUnits Info Cache (located in your home folder/Library/Preferences/your DAW folder). The next time you reboot Digital Performer, all plug-ins will be re-examined and compatible ones loaded.
I NEEDED IT YESTERDAY
If you don’t have an ISDN or T1 line and your corporate client needs your audio files immediately, OS X offers an easy way to perform FTP uploads (i.e., Internet file transfers) without buying special software. First, find out what file format (e.g., .AIFF) your client prefers to receive and save or convert all of your files accordingly. Name all the files with basic characters; don’t use spaces, slashes or any punctuation, such as hyphens, commas or periods in the file names. Drag and drop all of your files into your home folder (i.e., the Users folder with your name as the title), which is located on the left side of the Finder’s directory view.
Now launch the Terminal utility, located in Applications/Utilities. Type a series of commands (noted here inside quotation marks) in the Terminal’s window. First type “ftp” (without the quotation marks) and press Return on your QWERTY keyboard. The Terminal will respond with “ftp>.” Type “open” and press the spacebar. Then type the company’s server address (omitting the “ftp” header) on the same command line and hit Return again. The Terminal will show that you are connected to the FTP server and will ask for your user name. Type your user name and hit Return. When the FTP server asks for your password, type it and press Return again.
Terminal should now show you are logged into the FTP server. Type “put” and press your spacebar, then type the name of the first file (including any extension such as .AIFF) you wish to upload and press Return. After the file has been uploaded, type “put(spacebar)(file name)” for each additional file to be uploaded in turn, pressing Return to initiate each upload. When all uploads are finished, quit Terminal.
FOR YOUR EARS ONLY
Nobody wants their song sketches and pre-production work demos showing up on the Internet. When you no longer need these sensitive files, use OS X’s Secure Empty Trash command (under the File menu) to permanently delete them from the trash and assure peace of mind.
Mix contributing editor Michael Cooper is the owner of Michael Cooper Recording in beautiful Sisters, Ore.