Last month, I talked about how the gear you use can affect the speed at which you oper- ate in the studio, ultimately either saving you money or adding to the cost. Keyboard shortcuts, likewise, can lead to significant increases in speed. Here are some old and new chestnuts that you might not be aware of.
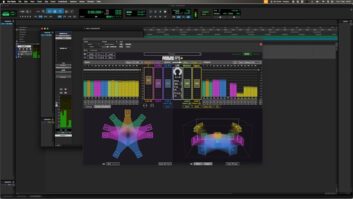
For example, the new Shift + up/down arrow shortcut for jumping between playlists in Pro Tools has changed the way I comp tracks. In previous versions, when comping vocals, I’d start by making a new play- list on the vocal track (Control + Backslash) and name it Voc Comp. Then expand all playlists by using Control + Command + Left arrow and organize them by using drag and drop. From there I’d make a short selection of a phrase or entire verse and hit Shift + S to solo the take in the mix. After playing it for the artist I’d jump the selection up or down to the next playlist by using the P or semi-colon key then Shift + S to solo the next take and so on. Once we found a word or phrase we liked, I’d drive it to the comp by using Control + Option + V. This worked very well until Shift + up/down arrow came along.
Now I’ll create the comp track and display the playlists as before to organize them, but then I’ll shut them down and use Shift + up/down to audition the takes from the single clip list view on the timeline. Once we find a piece or pieces we like, I’ll use Command + C to copy it, Shift + up/down to the comp playlist and Command + V to paste it into the comp. Not having the playlists open keeps the workspace cleaner, and eliminating Shift + S is much quicker.
I’m a stickler about the state in which I leave a session at the end of the workday. There’s nothing more annoying than opening a session where the playback head is parked in an odd spot in the song, tracks are in input or soloed, and the Edit window is zoomed into an edit. It’s a time suck to reconfigure the view to see and hear what’s going on. When you’re through with a session, it takes just a few quick steps to put the session in great shape for the next engineer—or yourself.
First, deselect any tracks or clips, kill any solos, then use Control + Option + Command + down arrow to fit all tracks vertically in the mix window. Next use Option + A to fit the clips into the edit window horizontally and locate the playback head to the count-off or top of the song, so you hear the song as soon as you hit the space bar. This takes less than 15 seconds; you just have to remember to do it. Once you take all the steps, choose to view the Edit window, save the session and use Shift + Command + W to close the session. Whoever opens the session next will see all the tracks nicely centered in the Edit window and will hear the song as soon as they hit Play.
Another way to drive yourself crazy is to have markers in sequential order but not in numbered order. This can happen when you tuck a missed marker into an existing group, making the numeric order 1, 2, 3,
10, 4, etc. It may seem minor, but it makes for a disconnected experience when locating to sequential markers using period + marker number + period. It just takes a minute to make everything beautiful again. It’s a hack, so some of the steps make no sense, but they work.
First, make a MIDI track (wha?). Then choose Export/MIDI from the File pulldown at the top of the screen. In the Export MIDI settings window that pops up, be sure the MIDI File Format is set to “0 (single track).” Click OK, then name and save the file as “Markers.” I’ll usually park it on the desktop so I can find it easily and throw it away later. Next, in the Pro Tools Edit window erase all Markers on the timeline by drag- ging across all to select them, then the Delete key. You’re now ready to re-import them from the exported MIDI file. Under the File pulldown at the top of the screen, choose Import/MIDI (Command (⌘) + Option (⌥) + I). Choose the previously saved MIDI file from the desktop, and hit the Return key or click Open. In the MIDI Import Options window, be sure to choose Clip List (New Track is the default), then click OK. The Markers will now appear on the timeline in the proper order.
When tracking, there may be more tracks in your template than you record. For example, you may set up tracks for B3, Piano, Wurli, Rhodes and Synth, but you only may record one or two on a particular take. Add drums, bass, electric guitars, acoustic guitars to that list, and you have a hodgepodge of tracks you may or may not want in Record on any song pass. Here’s where you can use a selection group to quickly get back and forth between non-consecutive tracks you want, or don’t want to record.
For instance, if I know the band starts most songs with drums, bass, electric guitar and piano, I’ll select just those tracks and push the Enter key on the numeric keypad. This brings up the same window you’d use to create a marker. Instead, check the Selection radio box, give it a high number (like 21), and name it TRACKS PNO. This selection comes in handy any time you have your tracks out of Record, like during a band playback and you quickly need to get back to your non-consecutive tracks you want to record. Simply type period + 21 + period, then use Shift + R to put the selection into record. I’ll make other groups for other scenarios (TRACKS B3 – #23, TRACKS WURLI – #24, etc.) in my tem- plate so I can jump between selected groups during the session.
Shortcuts like these can bring speed and agility to your workflow that will make a difference in your sessions. Please share your shortcuts on my Facebook page; I’d love to have yours on my list.

