Use this handy tip when trying to figure out how much delay is introduced by a hardware insert in Pro Tools LE or on any DAW where delay compensation is not featured. Sometimes, using a hardware compressor or EQ across a DAW track’s insert is preferable to using a plug-in. When using a hardware insert, the time it takes your converters to take the signal outside the box and then back in will introduce delay. The effect is that your tracks with hardware inserts will be later in time than their neighbors, which can cause phase differences that are unacceptable.
First, record any source onto a mono track; any source will do but it should have some kind of transient peak. Once finished, patch the output of that track to another input on your interface. Record the same signal from your first track to another mono track. This will give you two versions of that signal, with the second being delayed in time by the conversion process on the second track.
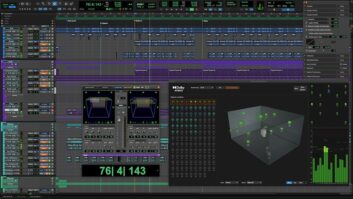
Make the two waveforms as large as possible so that both take up your entire computer screen. In Pro Tools LE, turn on the Tab to Transients feature at the top of your Mix window and choose the cursor tool (Command + 2). Pick a common transient after a clean start of a region on both tracks and adjust the zoom until you can see both region starts and transients at the same time. You should now be able to see a difference in the starting time of the audio on the second track you recorded; the start of this waveform and transient will be farther to the right on your screen. Click your cursor in front of the region on the first track and hit your Tab key. This should snap you to the first transient visible on your screen.
Push Command + E to separate the region at that point. Move your cursor to the second (and later) track in front of the region start and do the same. Now, to get a clean “gap” of the difference between the tracks, move the newly separated region from the later track with the Hand tool up to the earlier track while holding the Shift key. The space from the start of the region on the first track to the front of the region that you just dragged up is the delay between the two tracks.
You can view this in samples by going to the Main counter and changing the view to samples. Double-click on the front of the separated region on the first track and you can see the difference. This calculation will be good for your converters on your system at this sample rate only. You can figure out other delays by opening sessions at different sample rates and repeating the process. These numbers can then be used to nudge back tracks with hardware inserts, getting them close to where they started. You can fine-tune this once you insert the hardware by nudging the track back using the calculation discussed here, then listening to your track soloed against a copy of the same track without an insert. Nudge the track forward or back a few samples until they are locked in phase.
