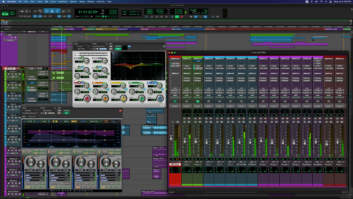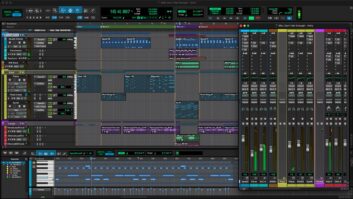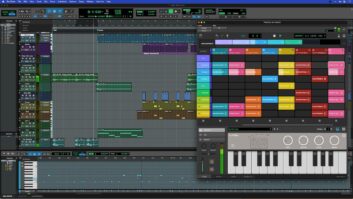
Since Avid’s jump to delivering its popular DAW within a subscription model, the company has delivered on promises to upgrade at a faster clip. There was initially some skepticism about the change from pros and new users alike. Reactions ranged from, “Why do I need another monthly bill?” to, “What’s the advantage?” But if the past year is any indication, it is clear that Avid is serious about living up to its promises, making it enticing to opt-in to the new purchase and support plans. The latest upgrade, Pro Tools 12.6, much like 12.5, delivers incredible new features that have taken the DAW to new highs in quick step.
LET’S COLLABORATE
Before looking at the latest version, let’s dig into 12.5’s collaboration feature, which was teased at nearly a year ago at NAMM 2016. In mid-March, days before 12.5 was officially released, I sat down with Tony Cariddi, Avid Marketing Director Audio, and Tim Carroll, VP of Audio Products, at The Blackbird Academy in Nashville for a live Mix webcast on Pro Tools Cloud Collaboration. At the time, I hadn’t used the software, but what Tony and Tim showed me seemed incredible.
Days later, I got to use it extensively on my own rig and realized that this would change how we all work—especially once the average user’s bandwidth matches Avid’s vision. But poking around 12.5 and using it as a pro are two different things, so I set up a collaborative overdub session between Blackbird’s Studio C in Nashville and percussionist Javier Solis’ home studio in Texas. Blackbird has a hefty up and down to the Net, but because the session was at 96k/24-bit with a lot of tracks, I was most concerned about Javi’s connection at the other end. He works out of his home in suburban Dallas.
To keep things neat and hopefully rolling, the night before the session I created 96k stems of a session with recording artist John Stoddard. My stem workflow is to use Pro Tools’ 12’s Commit feature from groups of tracks created with the New Track feature. I first Save my session As… and call the new session <song name – Stems>. Then I select each track in my stem group (e.g., Drums), and while holding Option + Shift, I click on any track output in the group and choose New Track from the pulldown. Then I choose to make a stereo Aux track, give it a name, and de-select the “create next to current track” so the group shows up at the end of the line. It happens a lot faster than you can read about it, and in the process each track’s output, the group channel’s input, and the group channel’s name are all the same, making for easy housekeeping when making multiple stems.
The next step is to select the just aux group track’s name (e.g., Drums), right click and choose Commit. From the Commit popup, you can consolidate clips, render automation, copy sends/group assignments, and choose what to do with the source track.
Using this process, I quickly got the original session down to seven stereo stems, hid and made my sources inactive, and quickly uploaded to the Avid Cloud. I texted Javier, who downloaded the stems in preparation for the session the next day. [Because we were both new to the software, I texted his phone, but there is a cool texting feature built into Pro Tools that makes it easy to text back and forth during a session.]
The next day we both logged in to Pro Tools at session time and got things rolling. Right away the light bulbs started flashing. Javier already had the tracks from the cloud, so there was no delay in him creating a new track for a triangle overdub. As soon as he created the track and pushed his “share” button, the track appeared in our session, which was set to “auto.”
The collaboration section in Pro Tools 12.5 is intuitive and simple. Up, down and share buttons appear on each track in both the Mix and Edit windows. You can make the tools appear or not appear just like Comments, I/O, and the other views. You can also choose to manually share, push or pull tracks, or set each to Auto, which happens a collaborator makes a move.
We were watching Javi work via FaceTime, which was frankly the clunkiest part of the experience. I hope that Avid will include a video feed in future versions, one with a simple talkback feature that would mute, or un-mute the video feed’s audio once recording starts. After the first OD, Javi pushed the audio to the cloud; after a short time for download, I started editing into the other choruses while he moved on to Congas. The rest of the session worked without a hitch, which was especially impressive at our sample rate.
After running one session, I started to have flashes of other workflows. For example, because you can share the session with up to three users, you could do overdubs and collaborate between two sessions while a third user edited tracks, cleaning up noise between passes and making everything neat. The potential for production power and speed is boggling. Before we move on, it’s important to note that collaboration is available in Pro Tools 12.5 HD and non-HD, whereas the new channel strip is HD-only.
CHANNEL STRIP AND BEYOND
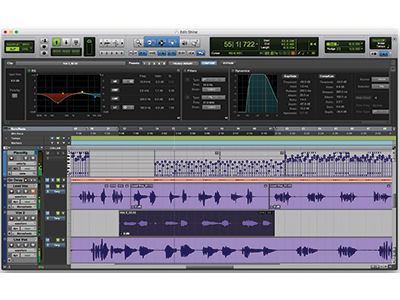
Pro Tools HD 12.6, released six months after 12.5, debuts the new Channel Strip, among other features. Unlike other DAWs that put an EQ on each channel in a session, the new Channel Strip works at the clip level providing an EQ, filters and compressor. It’s not a plug-in; it resides at the top of the edit window, or not—you choose the view. It’s not automatable; it’s more “analog” than that. And it’s not an Audiosuite process; you don’t have to render files, and it sits in the session in real time with zero latency. Clip processing is only available on pre-recorded clips; you can’t use it while recording. The clips themselves keep track of what you’ve done by adding an “EQ” or “DYN” tag right on the clip. You can process clips separately, then group them and apply global processing while keeping the original tweaks. This would be great for de-essing, or de-popping clips, then universally compressing them or adding other sweetening.
The power in the concept is that Channel Strip processing may be applied to each clip on the timeline, on all tracks in real time. This puts an astounding amount of processing power into a session right at your fingertips. The EQ, filters and compressor are easy to use, sound great, there’s a list of presets for quick setups, and just like a plug-in you can create your own. This tool is going to grow. Avid released a software developer’s kit at AES so third-party companies can write for the strip. I can imagine tuning and “personality” processors like emulated compressors built into the strip. The sky’s the limit.
If there is a downside, it’s that the processing is only available in HD. But Avid doesn’t completely leave non-HD users out in the cold. Channel Strip processing applied in Pro Tools HD still works if you open the session in Pro Tools 12.6 (non-HD). You lose the channel strip interface from HD but not the sound. You can choose to keep, or not use the channel strip processing applied on an HD session.
SO WHAT ELSE?
Pro Tools 12.6 adds a bevy of other features from simple tweaks like a blue playlist indicator to the right of the track name to show when you’ve got other resources below the topmost playlist, to more advanced re-recorder workflows for post users. For example, huge HDX film sessions with a lot of tracks can now reside on a single system without timing and latency issues.
Another addition is the new Layered Editing button, parked to the right of the annoyingly easy to toggle Insertion Follows Playback button at the top of the edit window. When Layered Editing is on, you can drag one clip over another (which now goes 50% opaque as you move it) without losing what’s below. In other words, if you move the edit back, the underlying clip is still there, not an empty hole as in the past. Pro Tools will also warn you if you’re dragging a clip onto another clip that’s offscreen by turning the clip red as you move it.
Shift+up/down on a selected track now toggles between playlists. This shortcut would benefit from a lock on/off switch. Someone poking around trying to find other time-savers might accidentally change a playlist when hunting for a similar shortcut. Fading also got an upgrade in 12.6. From the smart tool, you can now alter fades freely by hovering at the vertical halfway point of a fade, holding the mouse then moving them around. I’d like to see an option+click function here that would snap a fade to linear.
DO YOU NEED IT?
Is Pro Tools 12.6 worth the move? In a word, YES! I regularly jump between Pro Tools 11 and 12 for tracking, overdubs and mixing on various systems. By far, Pro Tools 12 delivers the goods that truly make a difference in workflow speed and function. And if you’re way back at PT 9 or before, it would behoove you to make a move now.
Case in point, I went from a 12.5 tracking session and used Save Copy In… to save back to Pro Tools 7►9 for a band that was still using Pro Tools 8 at home. The session would not open. It stalled at loading the fades with some audio showing up, and other tracks sputtering. I don’t have experience with it, but I can’t imagine that going back to 5.1►6.9 would work any better. It only makes sense that there has to be a backward breaking point, and I believe this is it. So bank on the future, Pro Tools 12.6 has what you need, whether you know it or not.
PRODUCT SUMMARY
COMPANY: Avid
PRODUCT: Pro Tools 12.6
WEBSITE: Avid.com
PRICE: HD $2,499 (perpetual license w/upgrades, bonus plug-ins); HD $83.25 (monthly, one-year plan w/upgrades, bonus plug-ins); non-HD $8.25 (student, monthly, one-year plan); non-HD $24.92 (monthly, one-year plan); non-HD $299 (perpetual license). See website for support plan and upgrade pricing.
PROS: New Channel Strip (HD-only) is ground-breaking and sounds great. Non-HD features including collaboration make it a worthy upgrade.
CONS: Texting within session works well, but built-in video communication is sorely needed.
TRY THIS
Instead of using a de-esser plug-in, which can alter the sound of a track if set too aggressively, use the new Channel Strip to solve the problem. First, split the problem sibilance by selecting it and using the letter “B” shortcut. Then use the Vocal De-Esser Traditional or Aggressive Channel Strip preset to nail it down. You can also save your own version of the De-esser and use that by recalling it over a new bit of sibilance. It’s quicker than using volume automation editing and written right to the clip.
Kevin Becka is Mix’s technical editor
